 French
 Danish
 Swahili
Welcome To New Version OF DADORG
(Customer Guideline On Dadorg system)
How to register-
1. Open the new dadorg by typing this url in web browser https://www.dadorg.com/
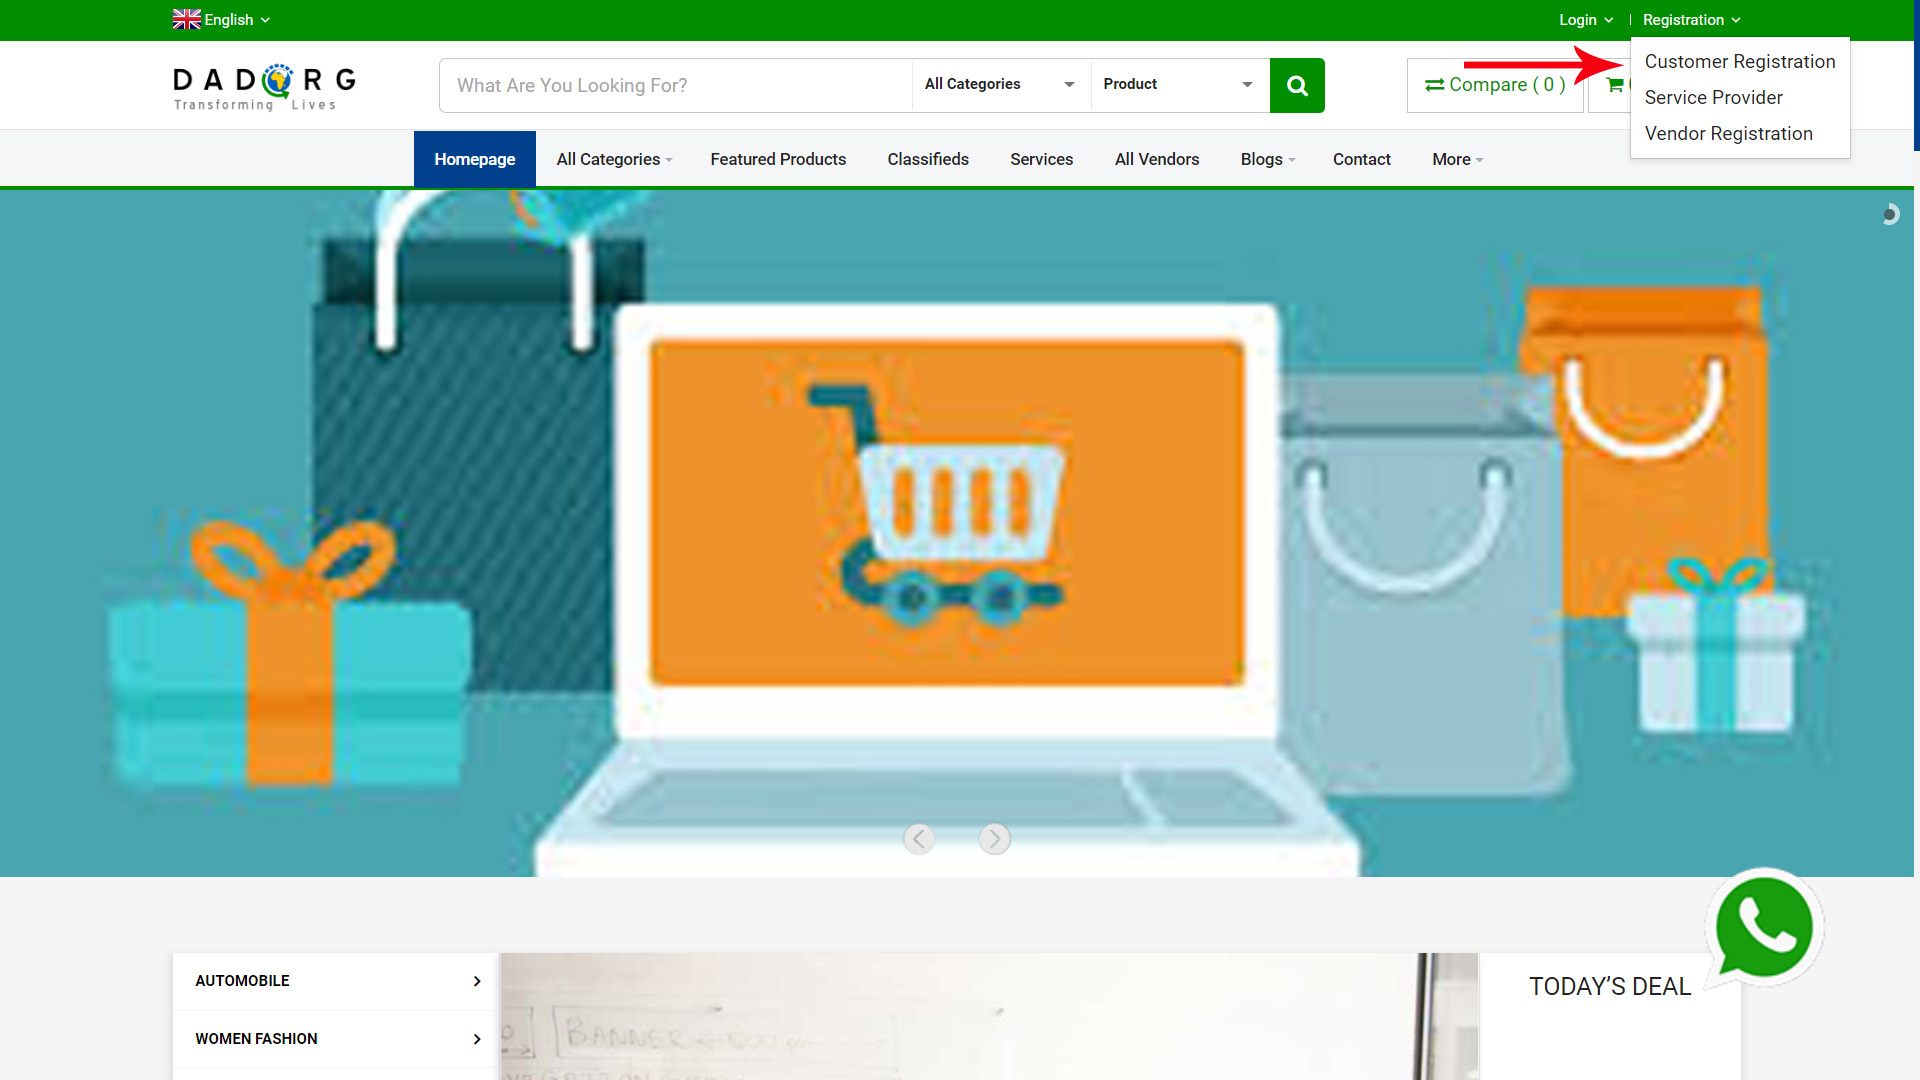
2. In top right corner of screen there is an option “Registration” click it, you will see a dropdown. Select “Customer Registration”
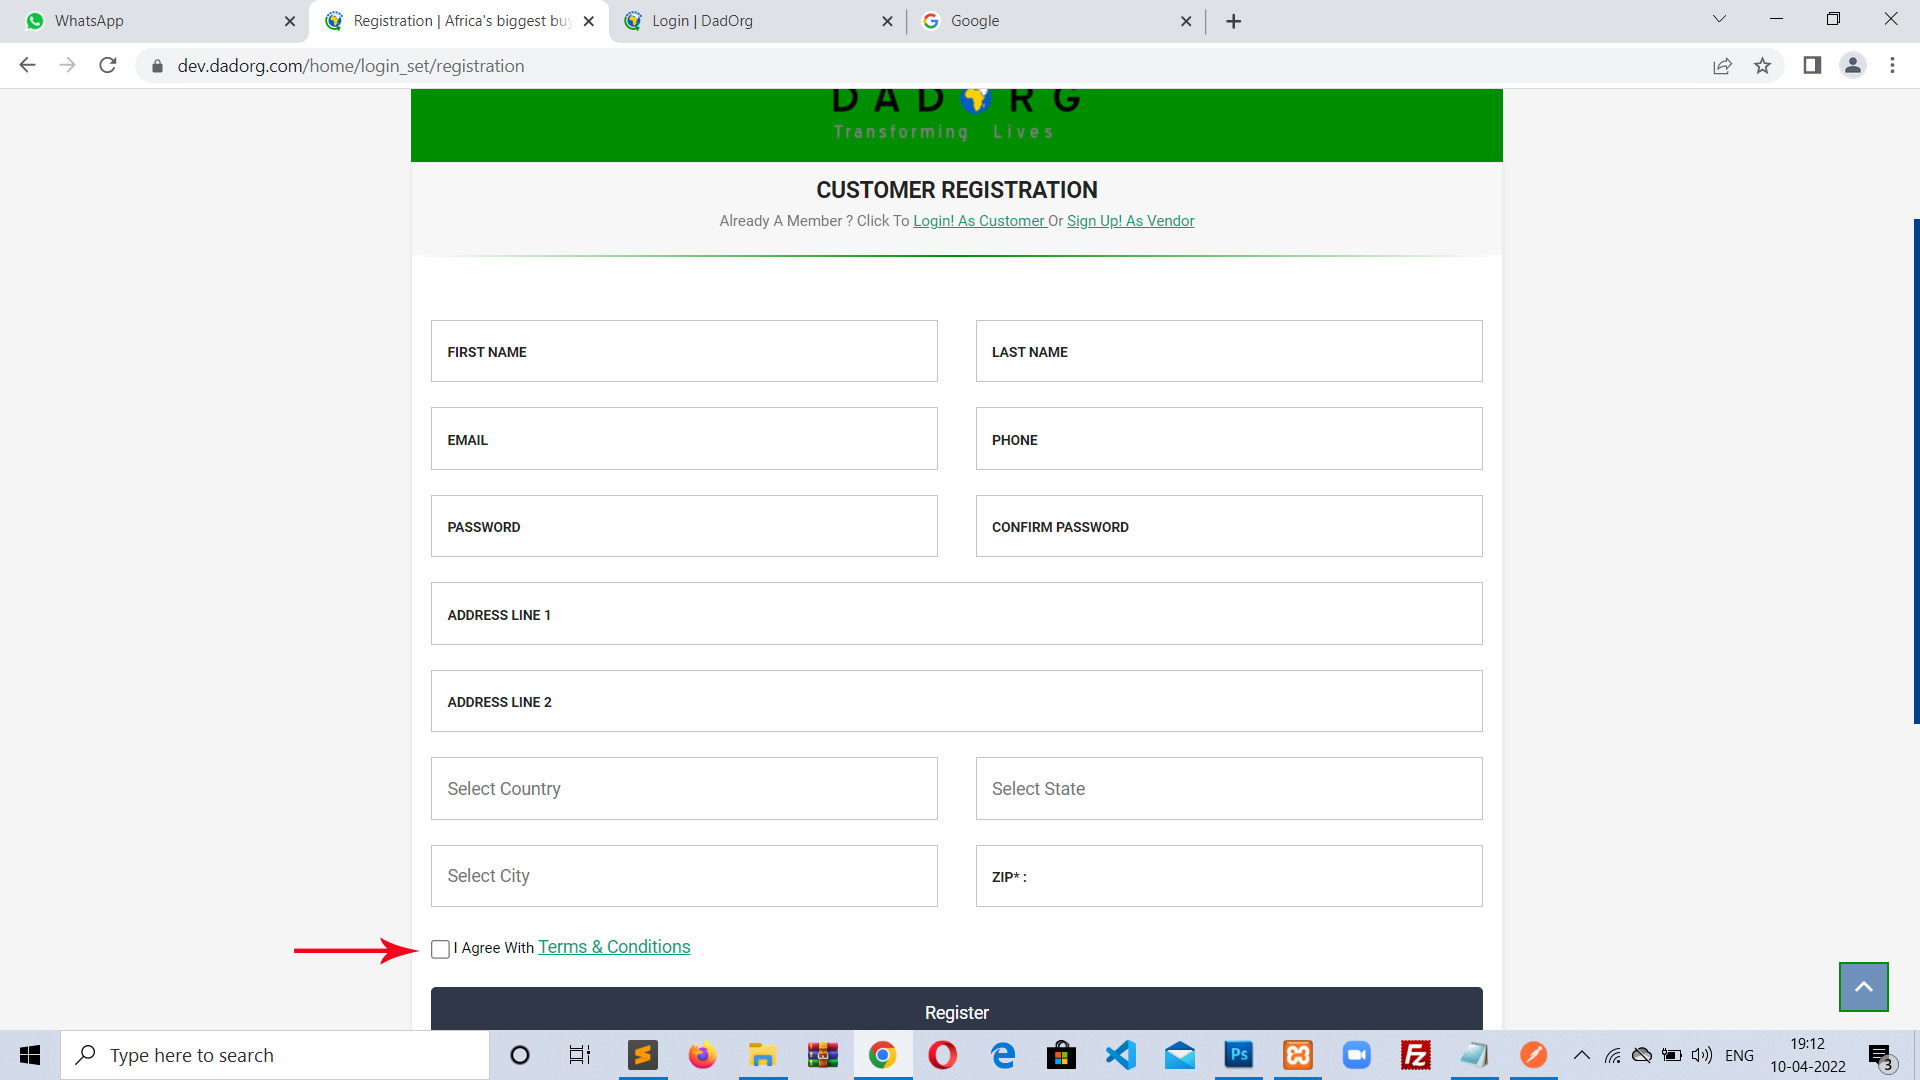
3. You will see a form on your screen. Fill that form with all information about you correctly.

Then accept the term & conditions of dadorg by checking the tick box and then click on “Register” button at bottom.
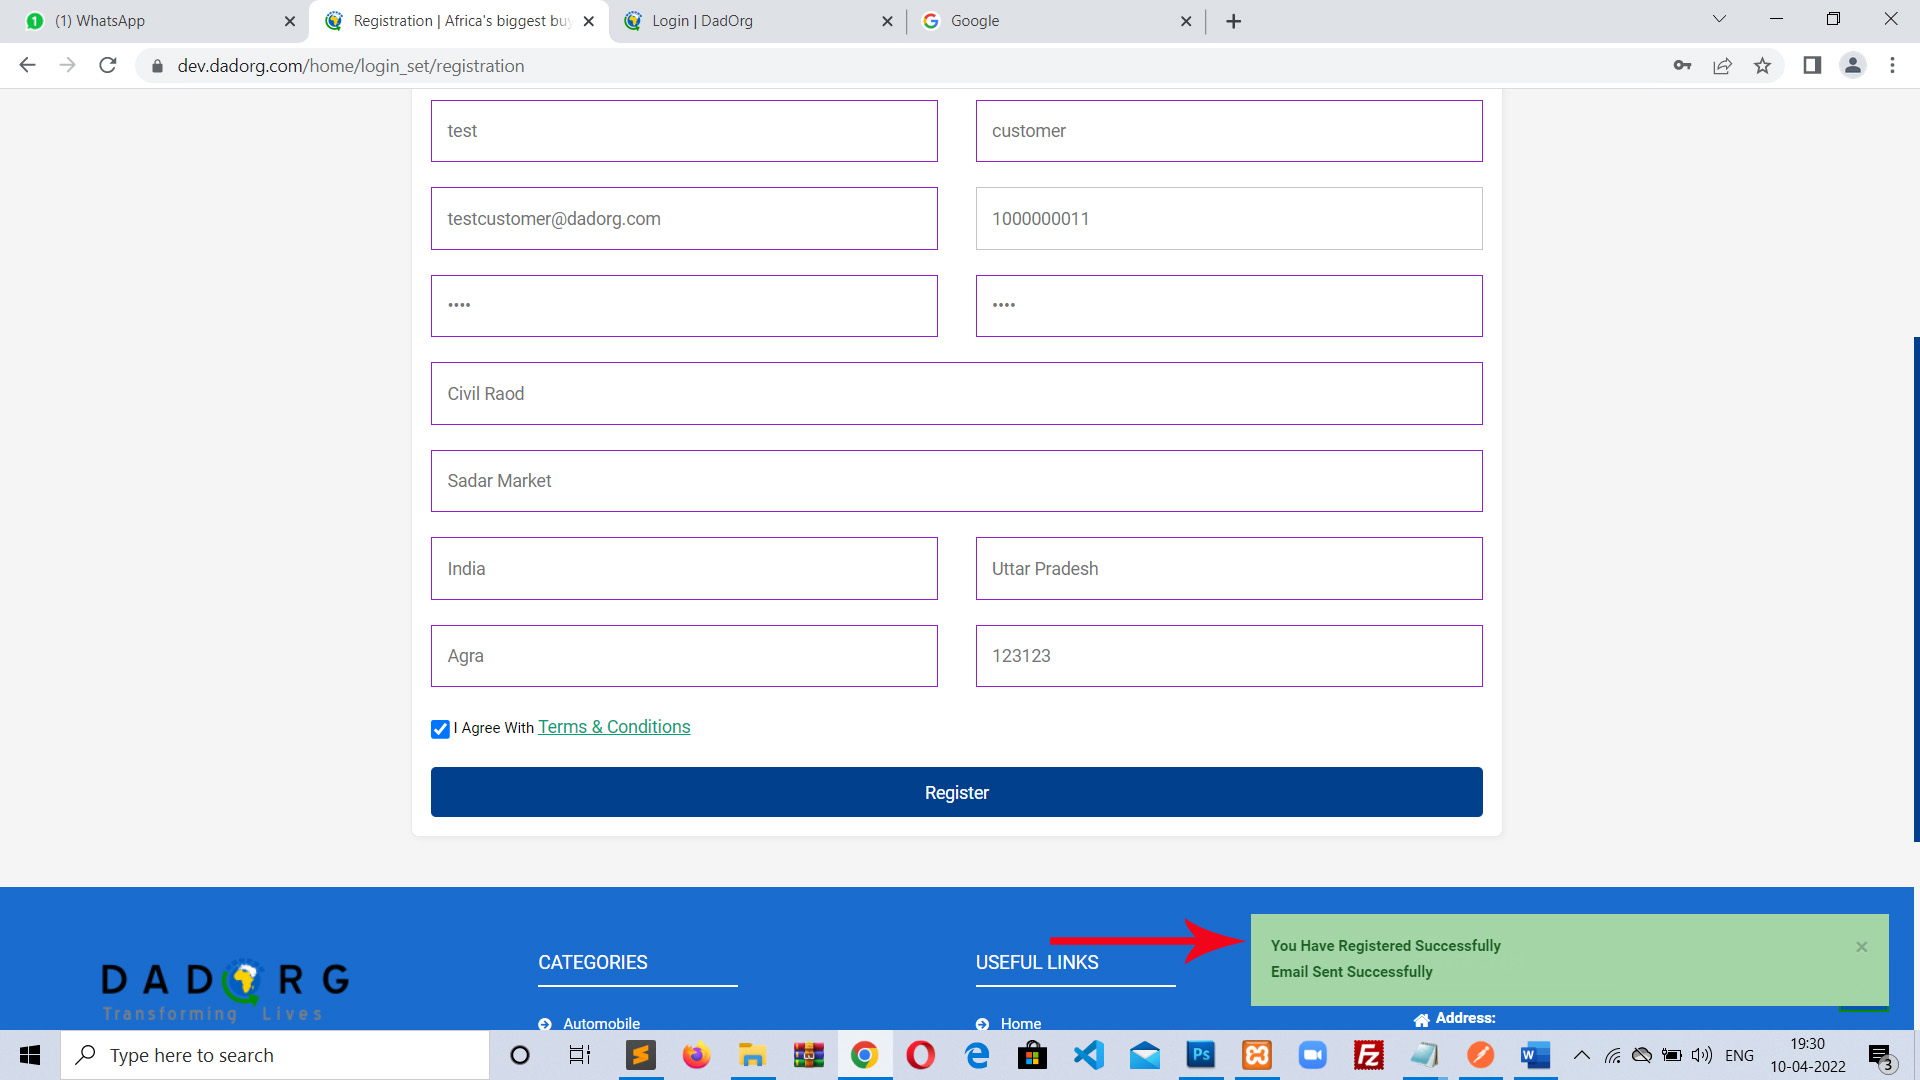
1 4. If you have filled all information correctly then you will see a success message on bottom of screen. Now registration is done successfully.
5. Now you can login with email and password filled in registration form.
How to Login-
1. To login into your account, click on “Login” option at top right corner of your screen.
![]()
2. Fill the email and password created in registration process.

3. After login you will redirect to your profile page. Under “My Profile” section in left side you can see all profiles options:
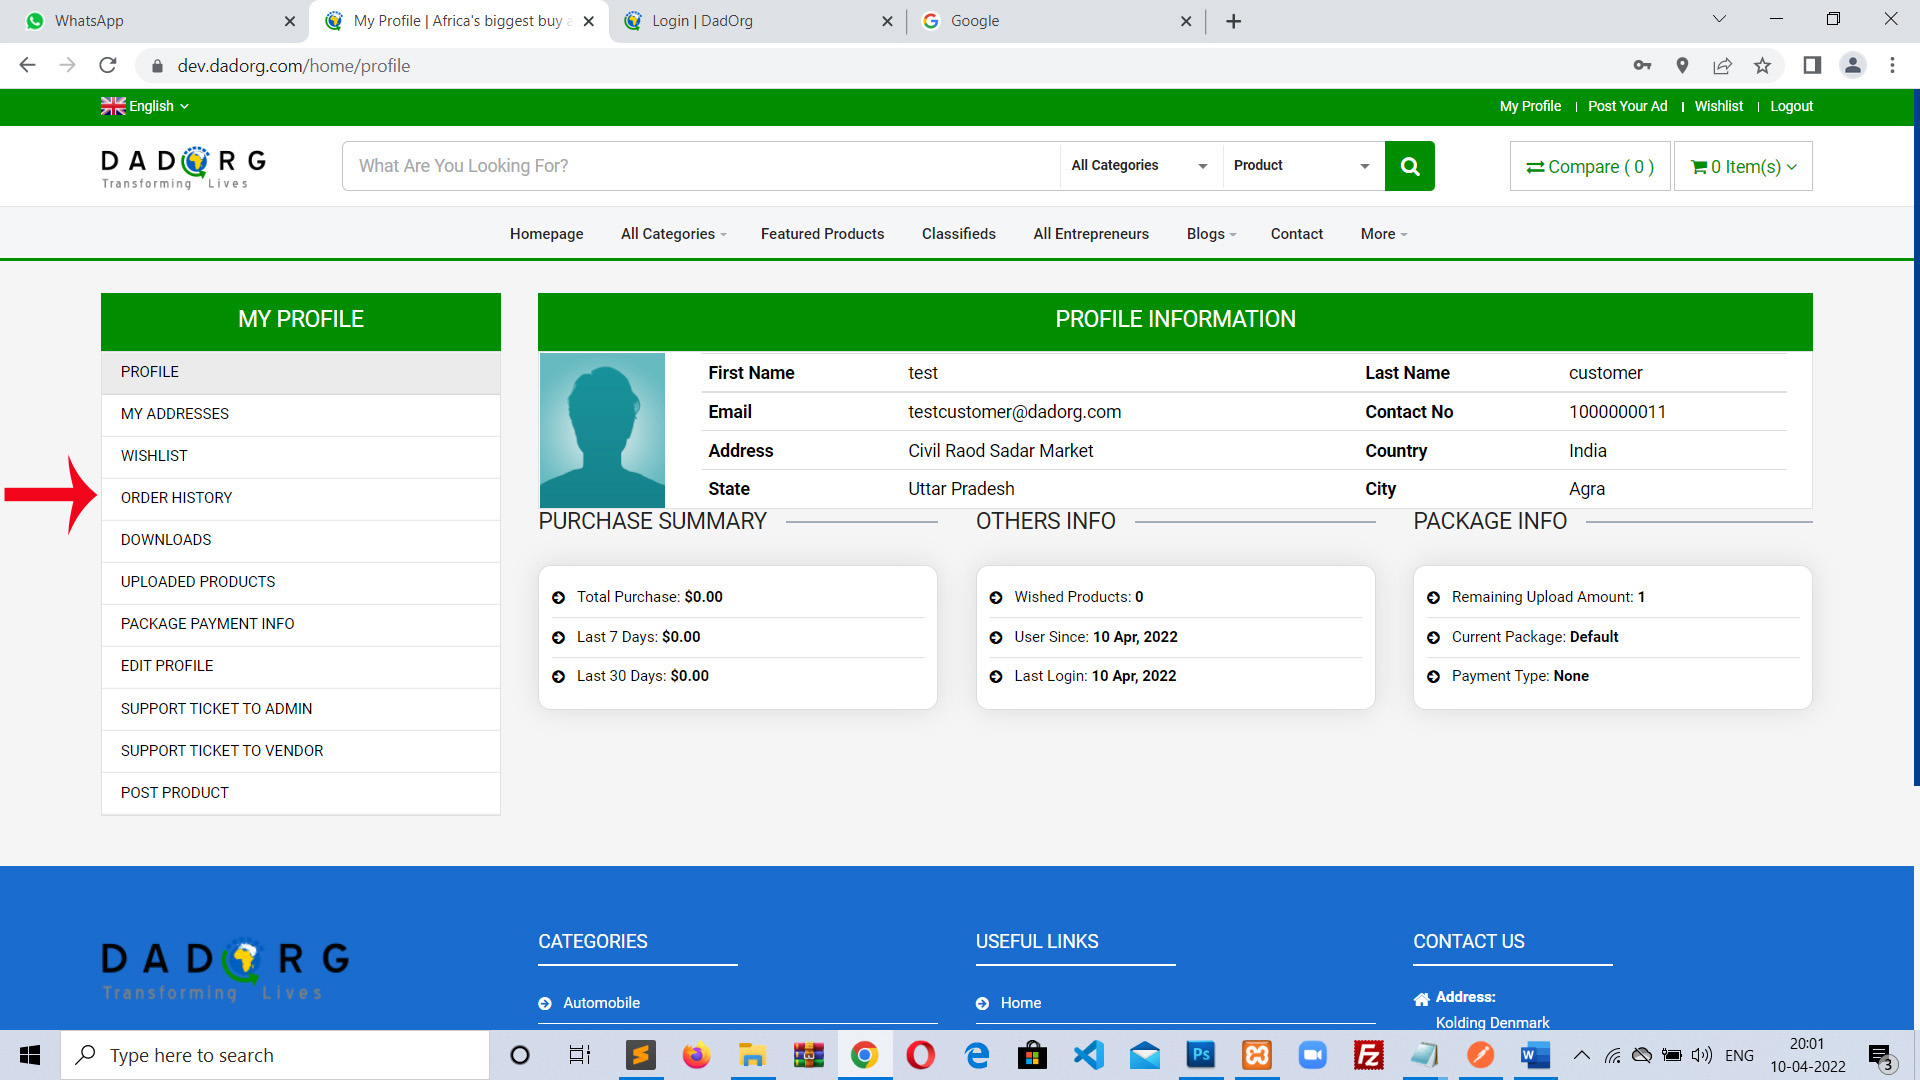
Customer Profile Features-
1. Profile: Under profile option you can see all summary of your profile
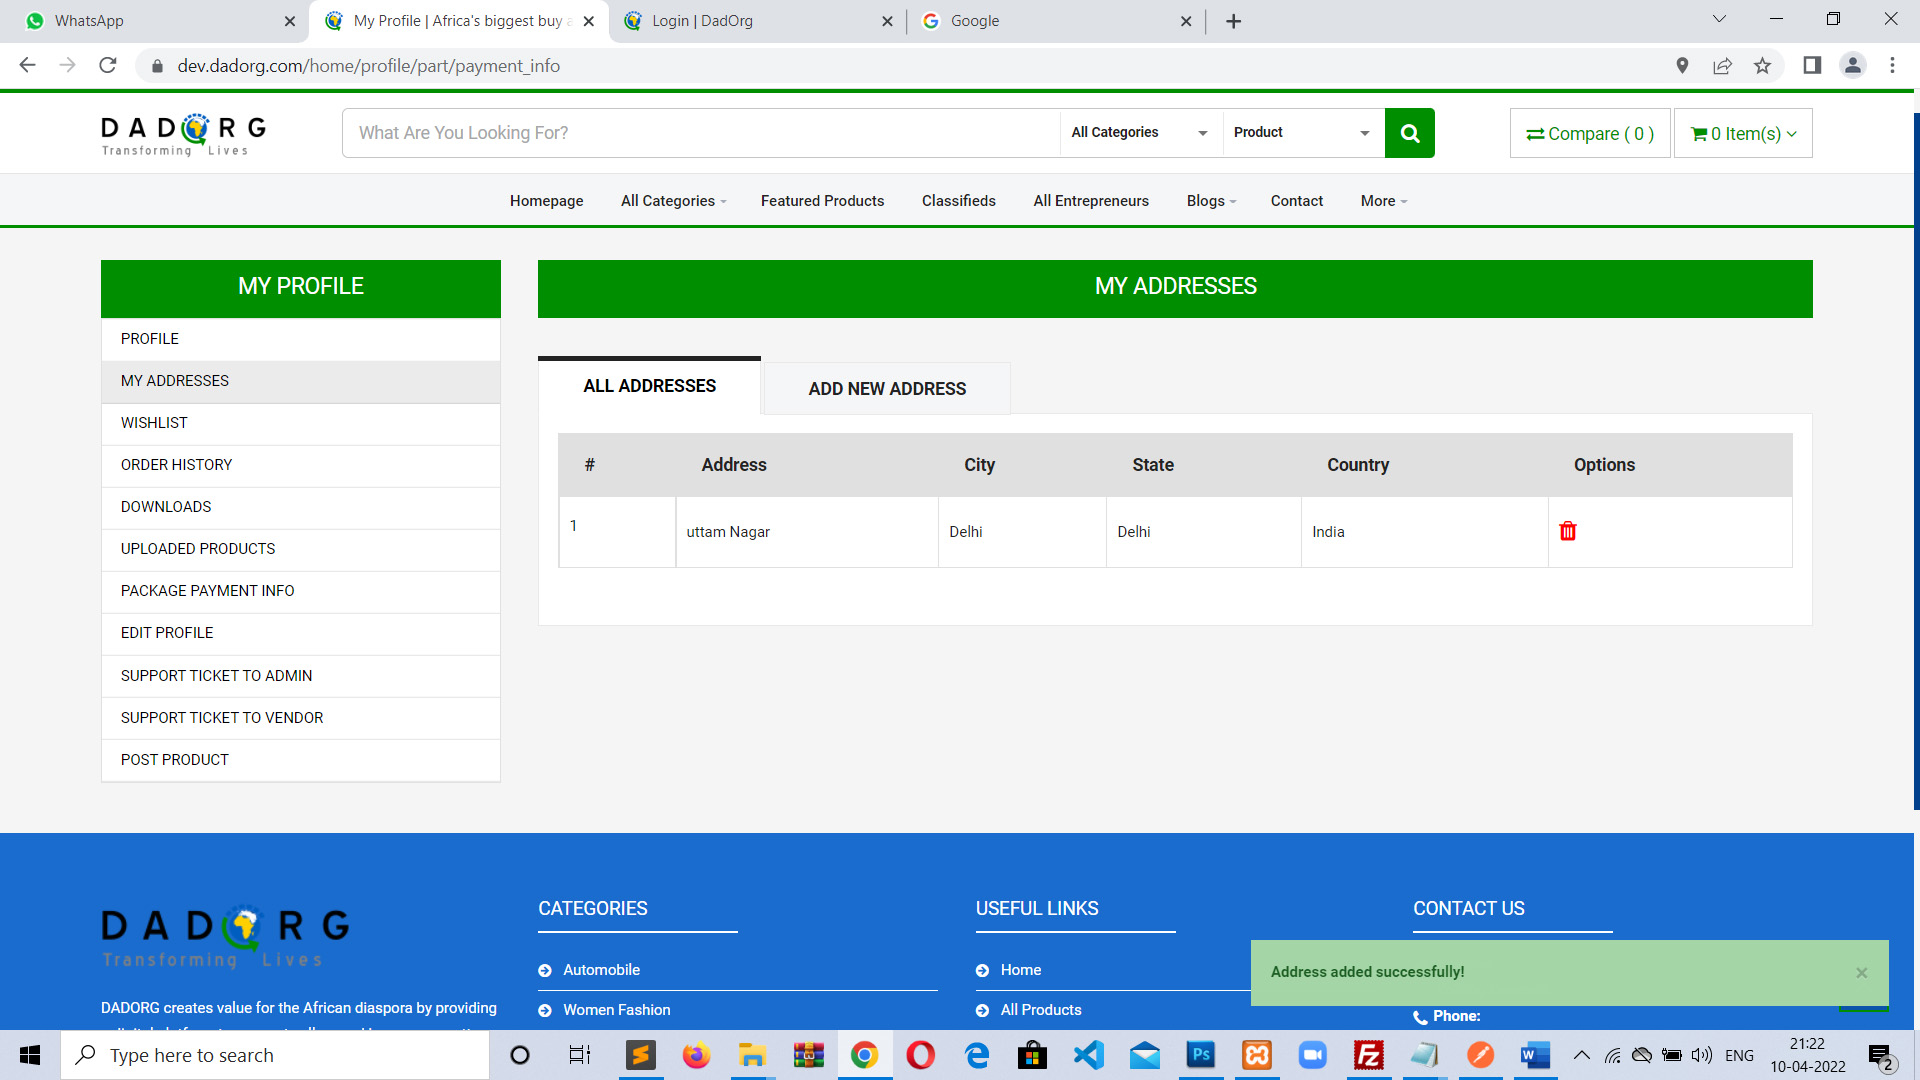
2. My Addresses: Under My addresses you can add more address for your delivery locations. These addresses will help you to receive your product to more than 1 location.
So under “My addresses” screen click on “Add New Address” tab to add more addresses.
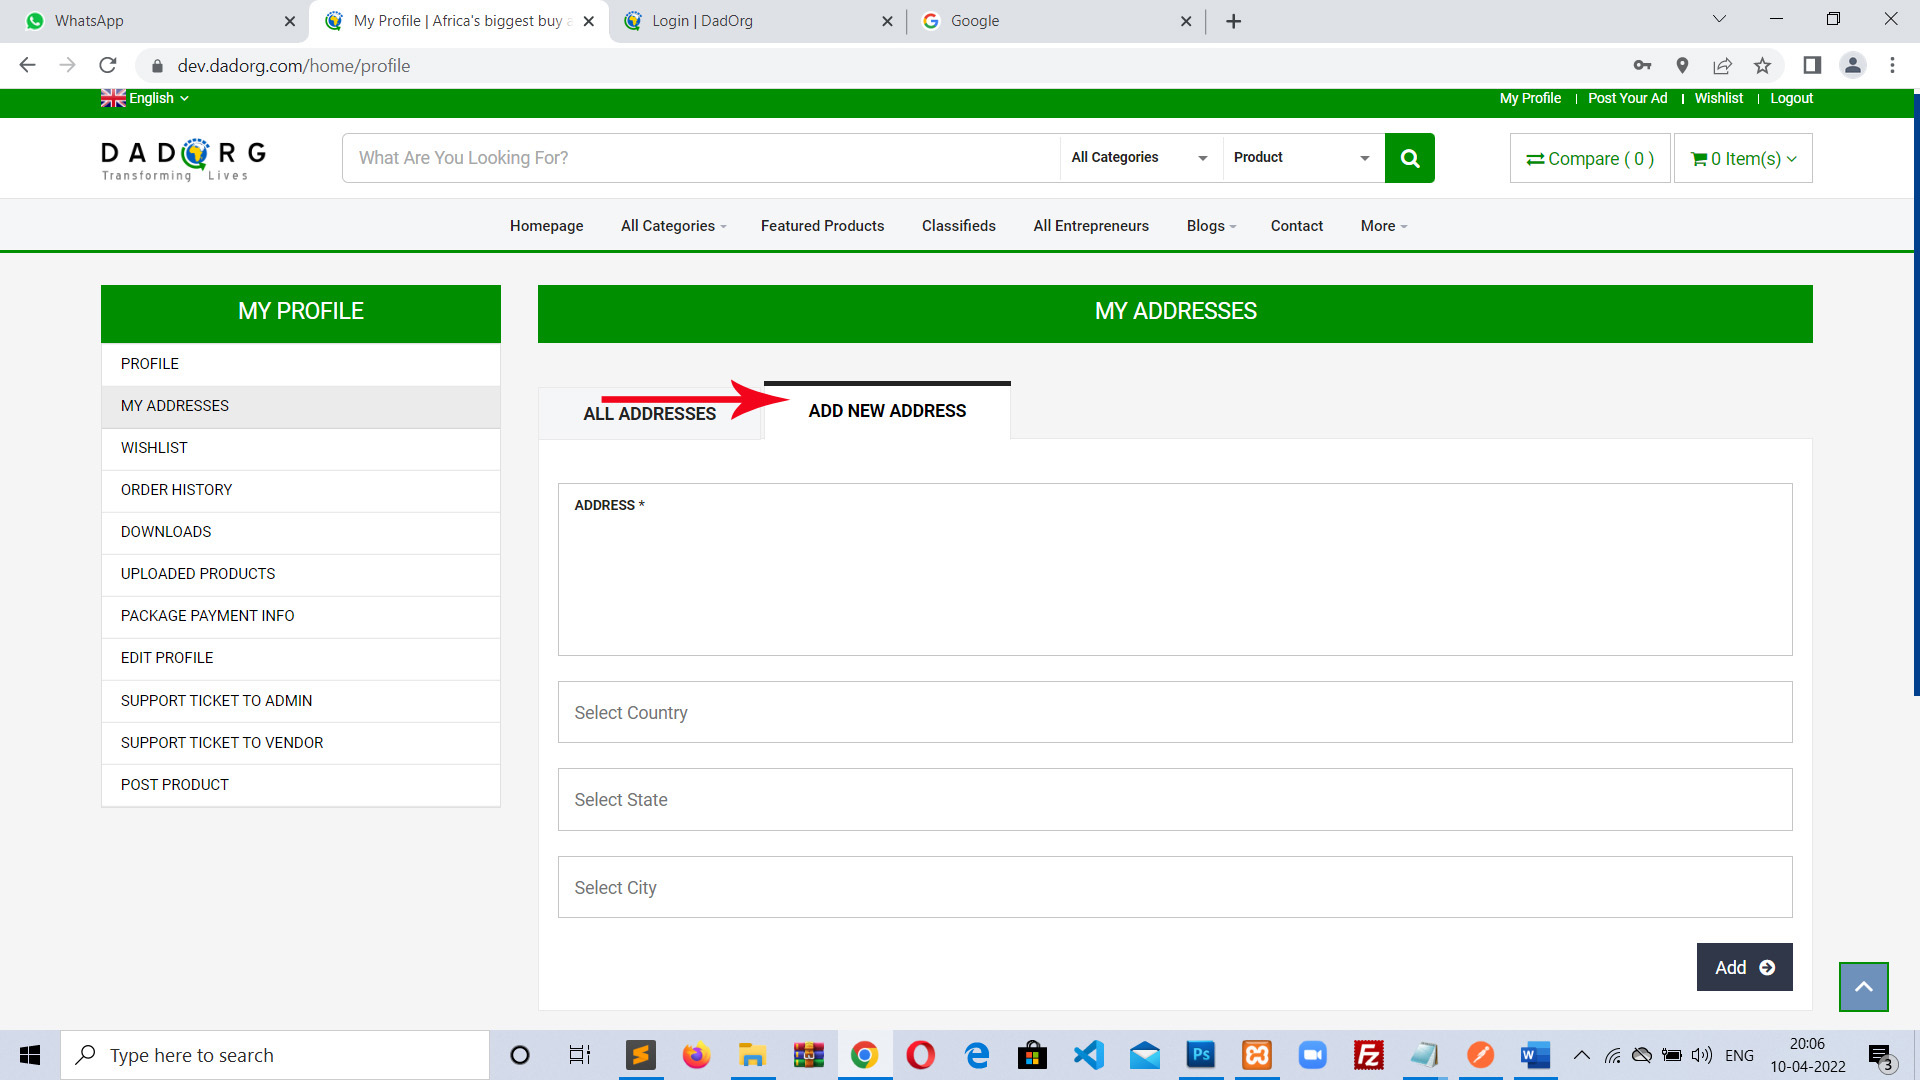
Fill all fields and click on “Add” button to add address.
You will see success message at bottom right and new address will be listed under “All Addresses” tab
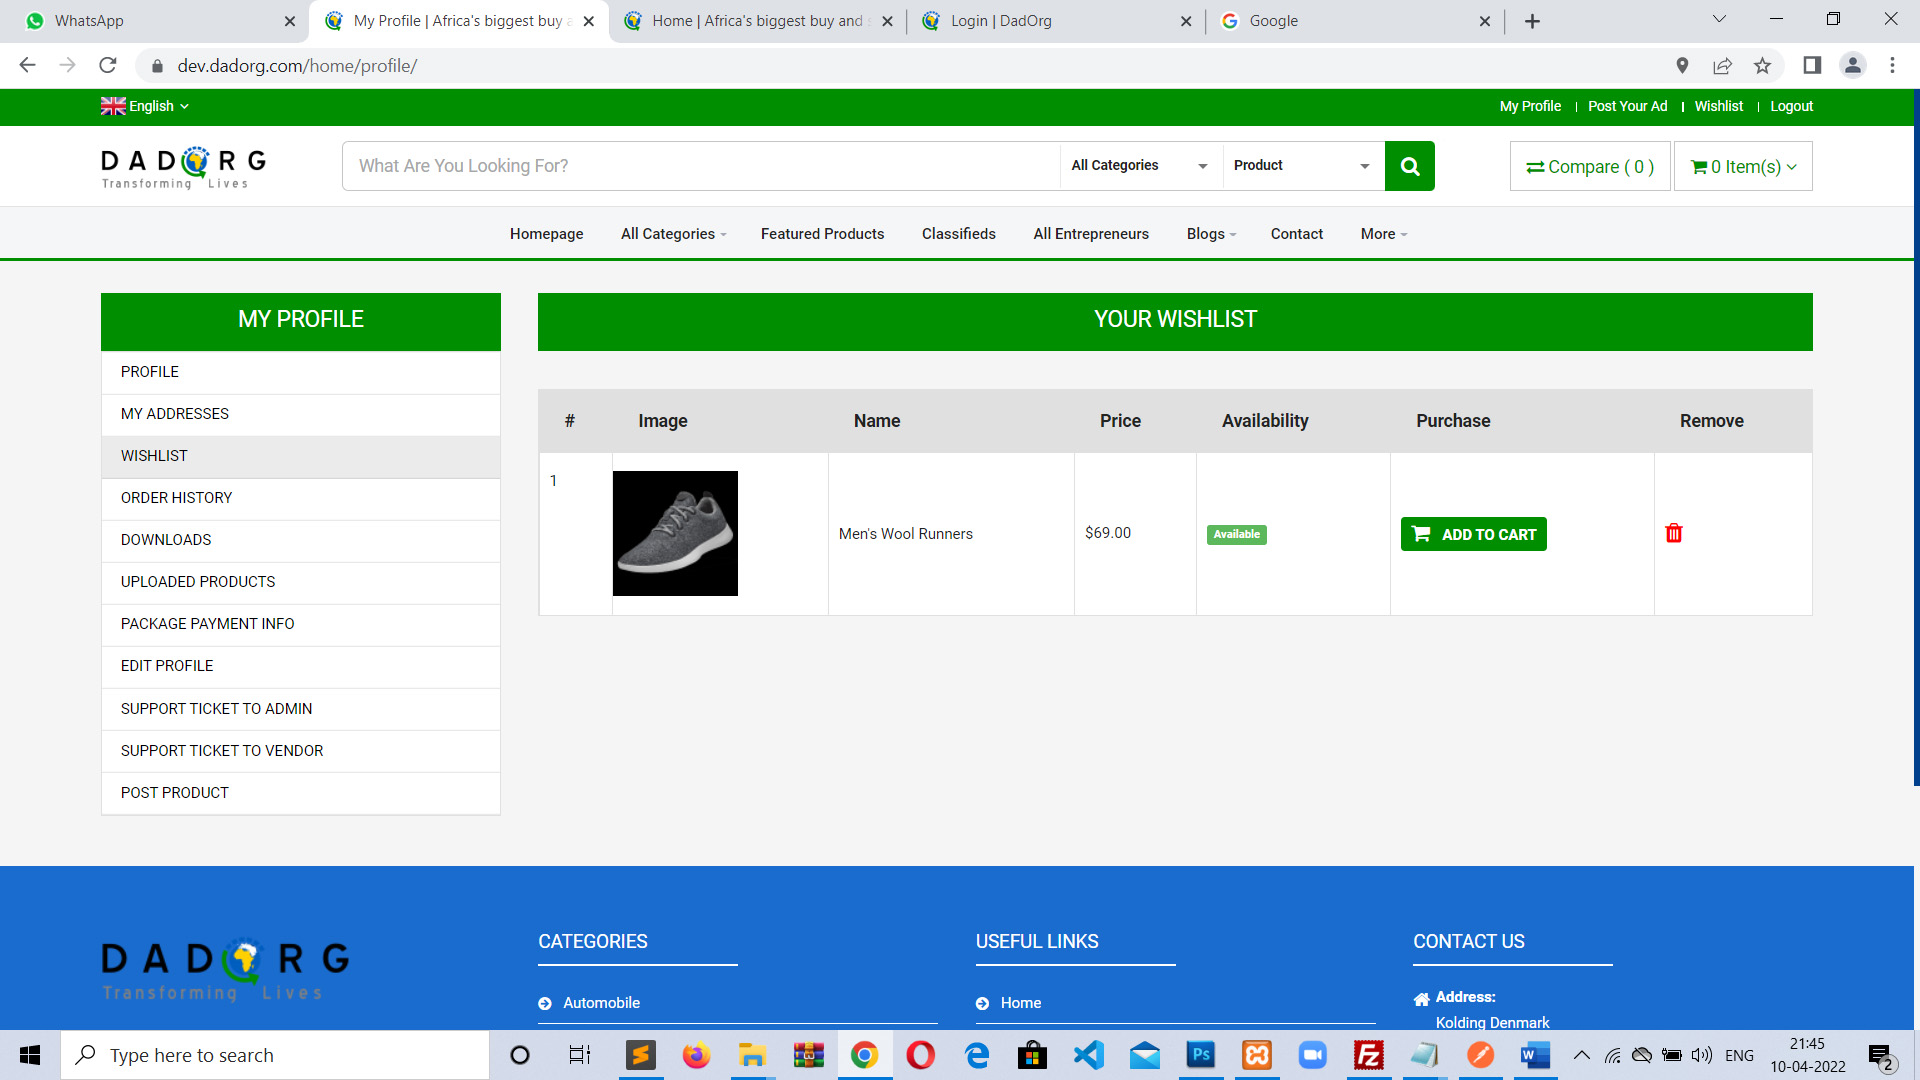
3. Wishlist: Wishlist refers to favorite products. In dadorg system Wishlist will be considered as customer’s favorite product list. So you can add your favorite products to Wishlist for future.
To Add product to Wishlist:
Click on home option from menu navigation

Now on home page under “Latest Featured Products”, you can see some products. Click on any product:

Next screen you will see product detail page. Here by clicking on “Add to cart” button you can add this product to your Wishlist.

Now check your Wishlist, Click to “My profile” link on top right of your screen

And on profile page from left options click “Wishlist” option
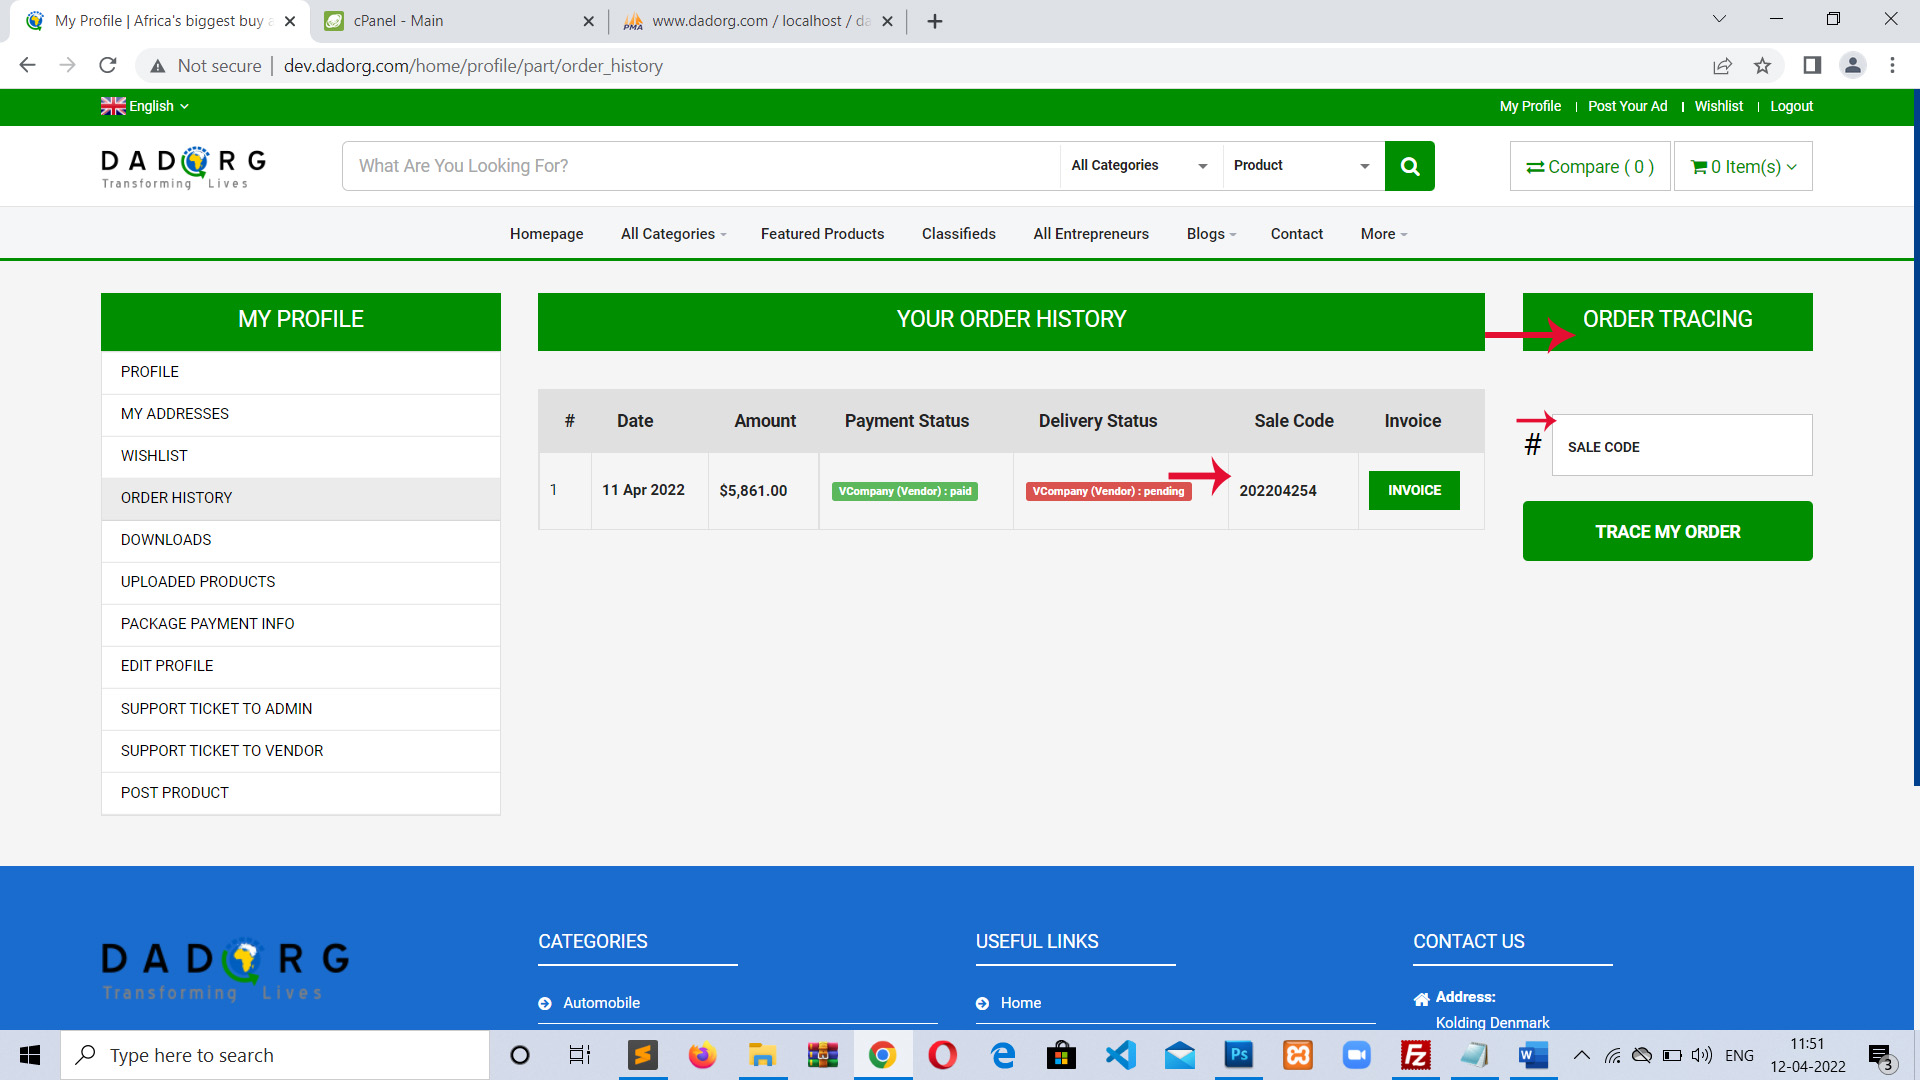
4. Order History: This section will have history of all the purchased orders by customer with Invoice. So customer can check past order details anytime.
5. Downloads: If you purchase any digital product service then all your digital products download list will be available here.
6. Uploaded Products: All the product that you will upload, will be listed here.
Dadorg provides facility to general customer to upload their products (new/used) to sell on dadorg platform. By this buyer can see your product and contact detail to contact to you.
7. Package Payment Info: To upload their product dadorg provides some packages at very low cost to sell customers products. So this section will have all details about package.
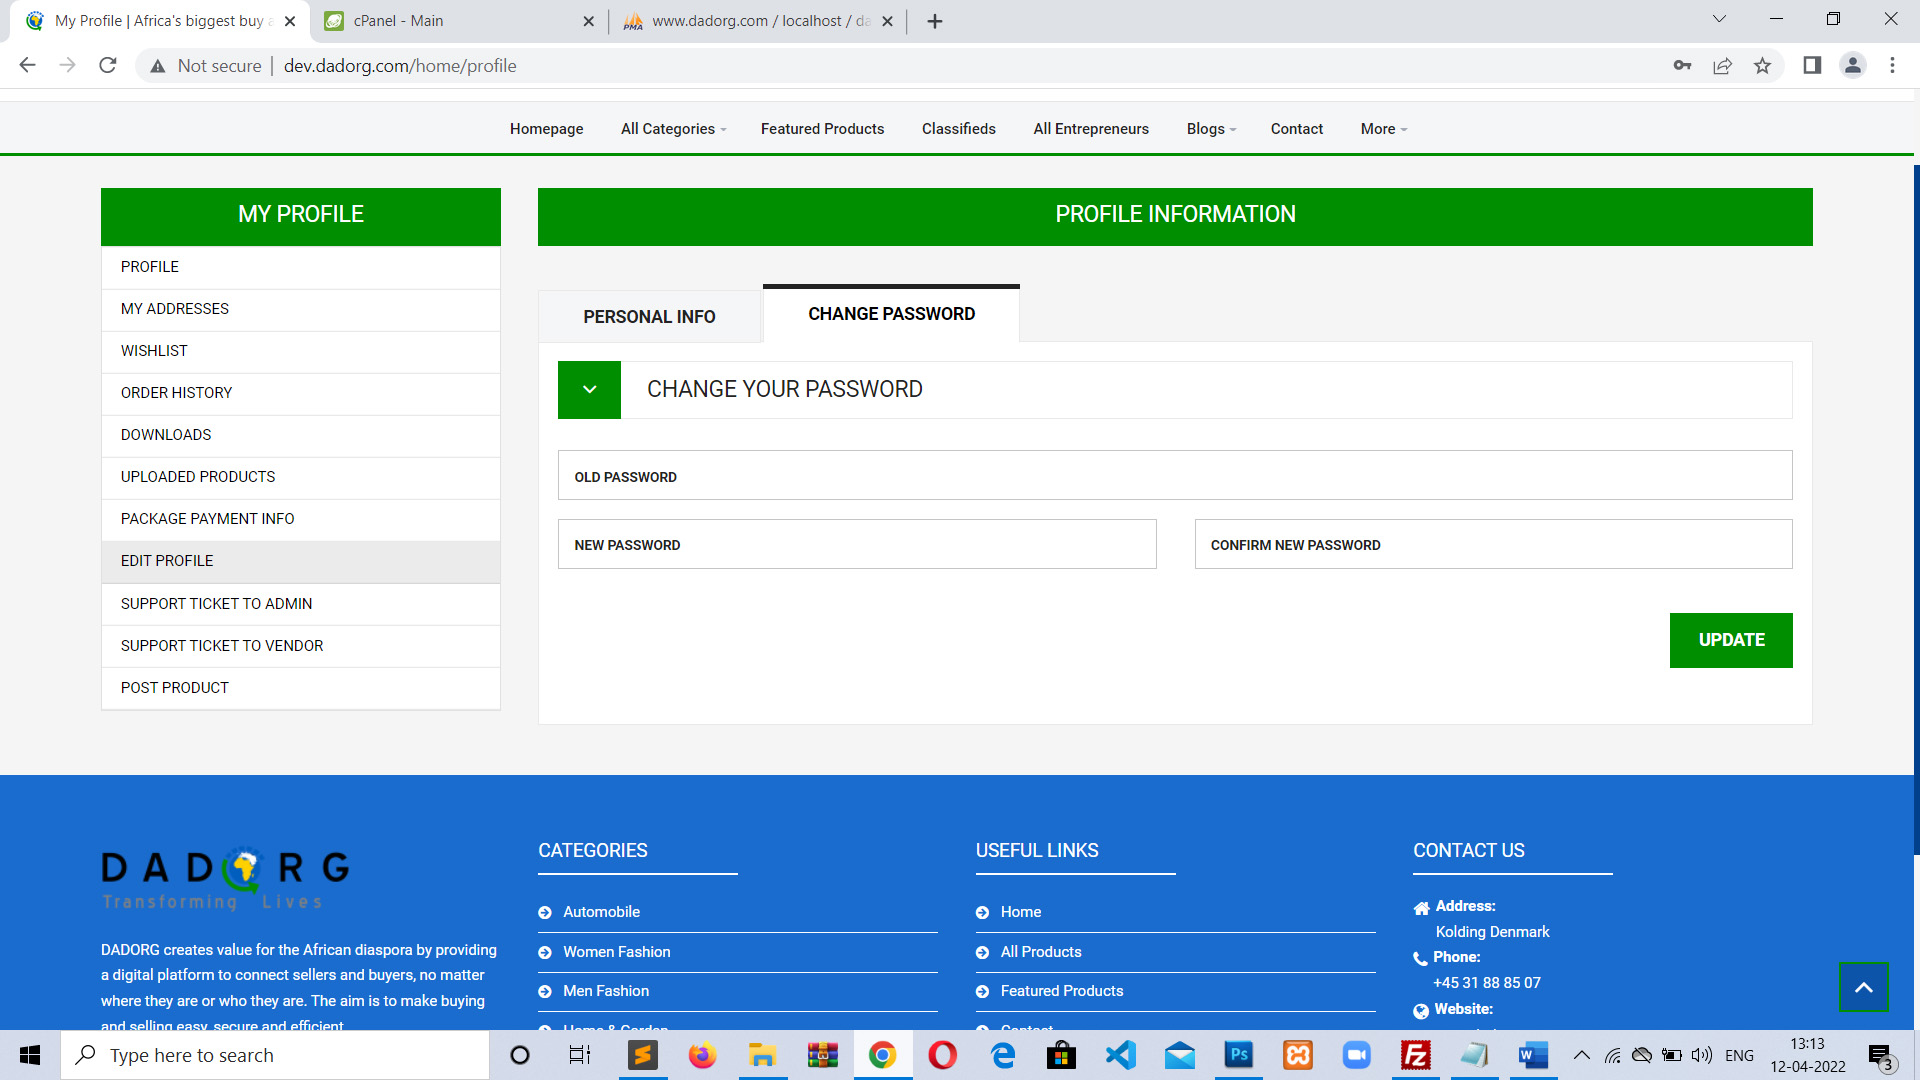
8. Edit Profile: Here you can edit your account details.
Here you can edit your profile details.
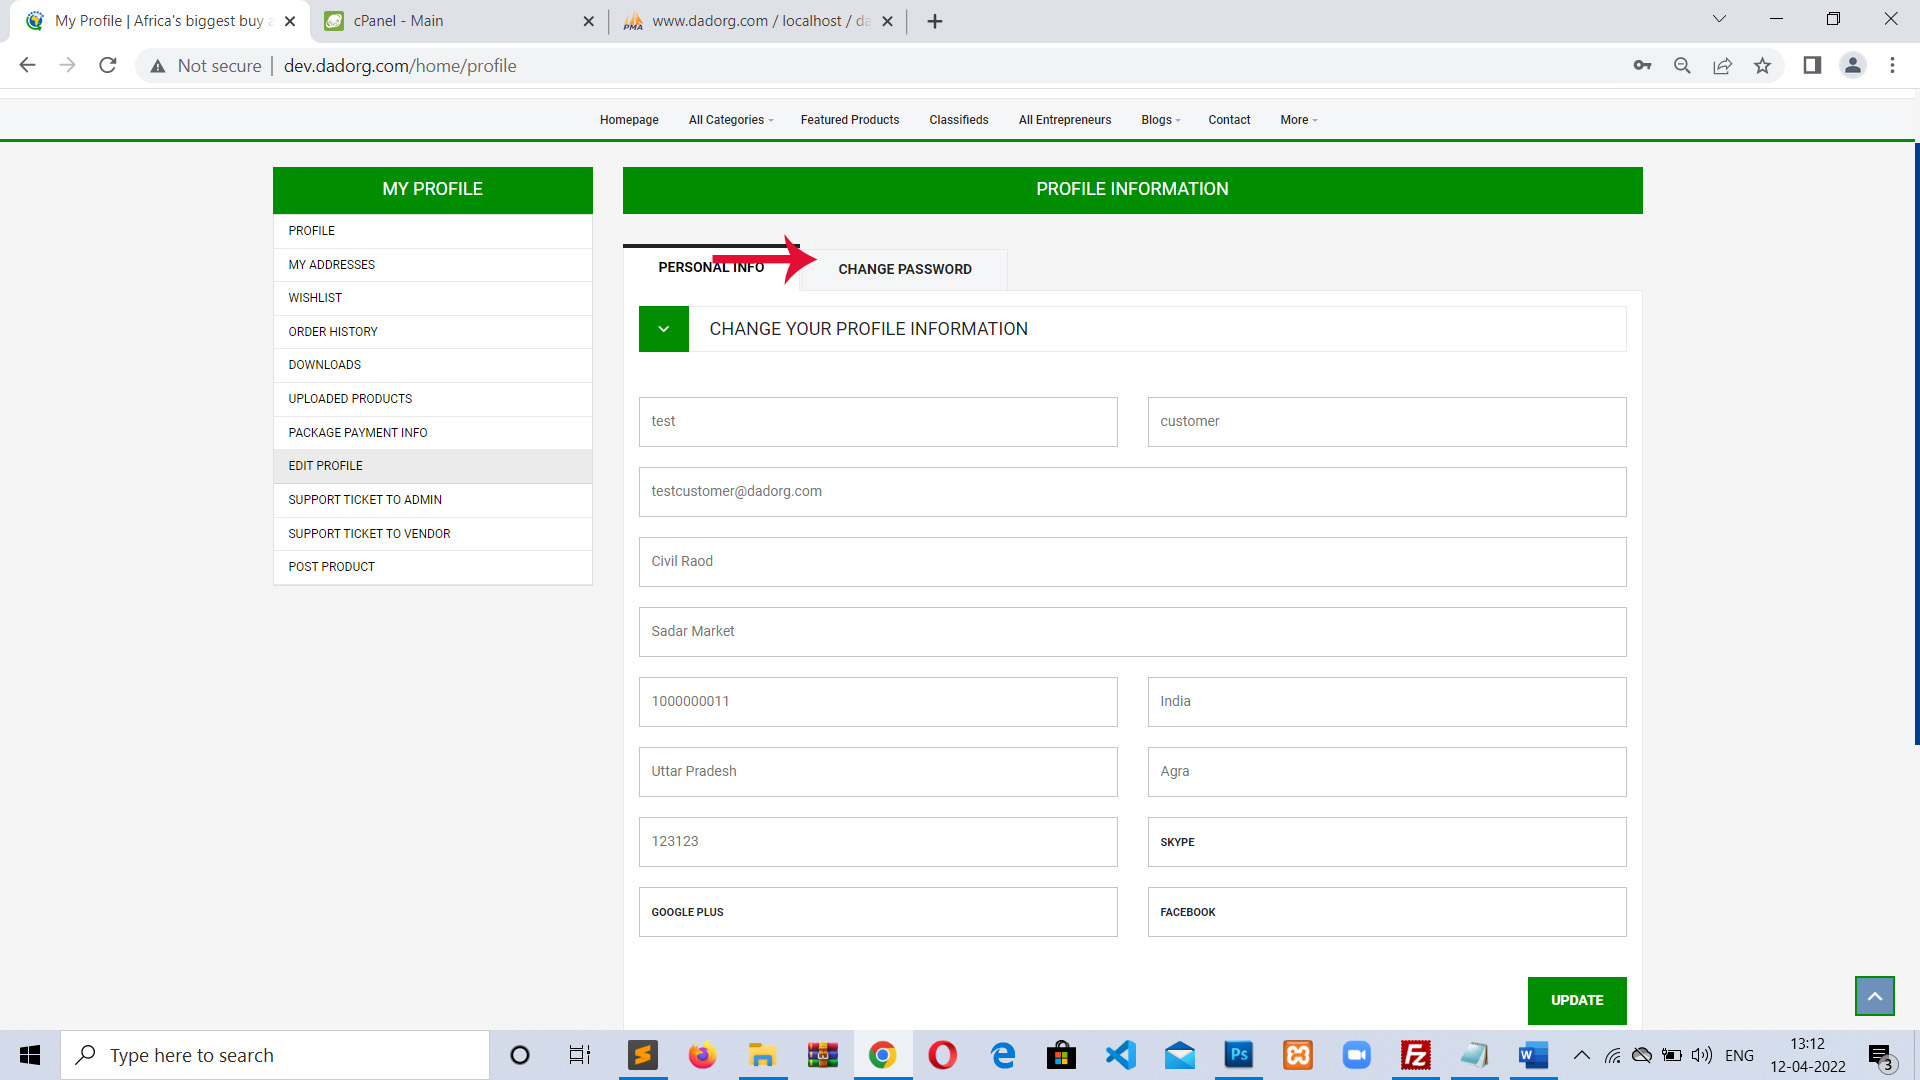
There is also an option for change password.
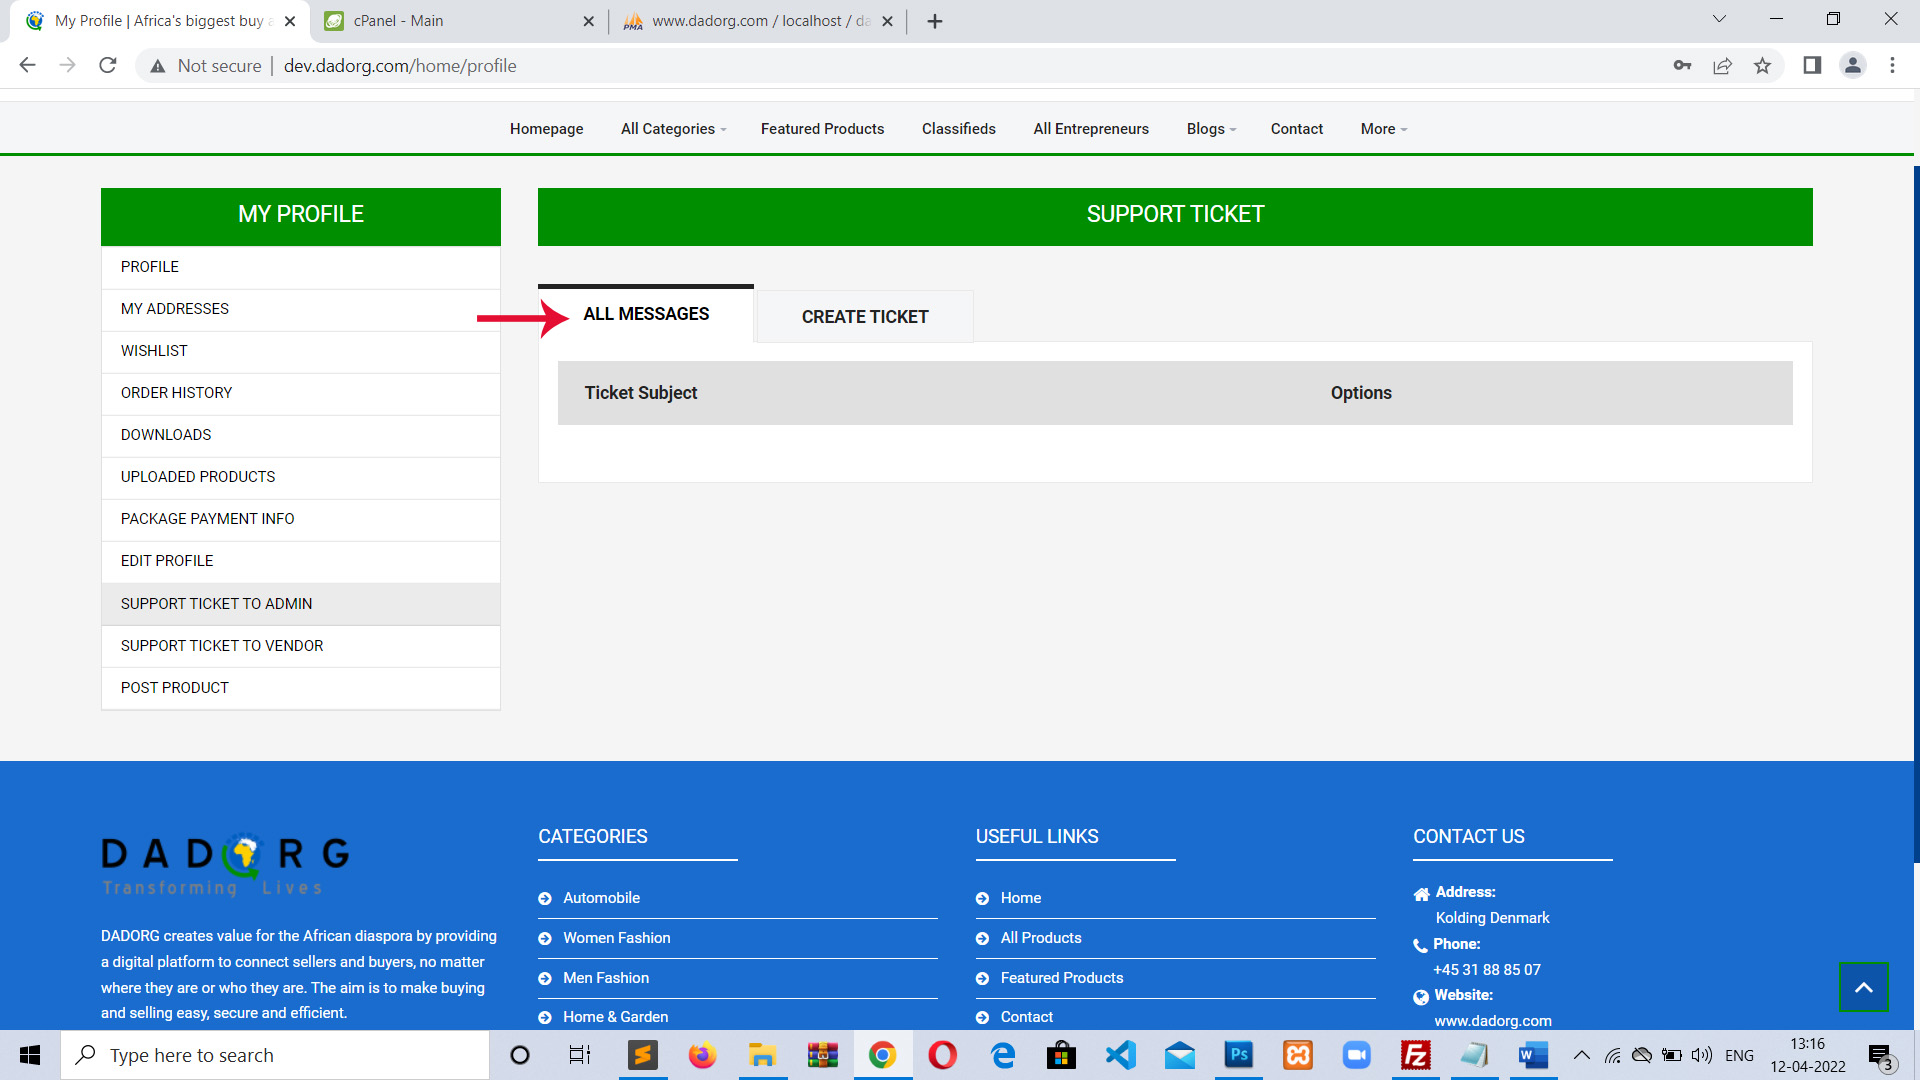
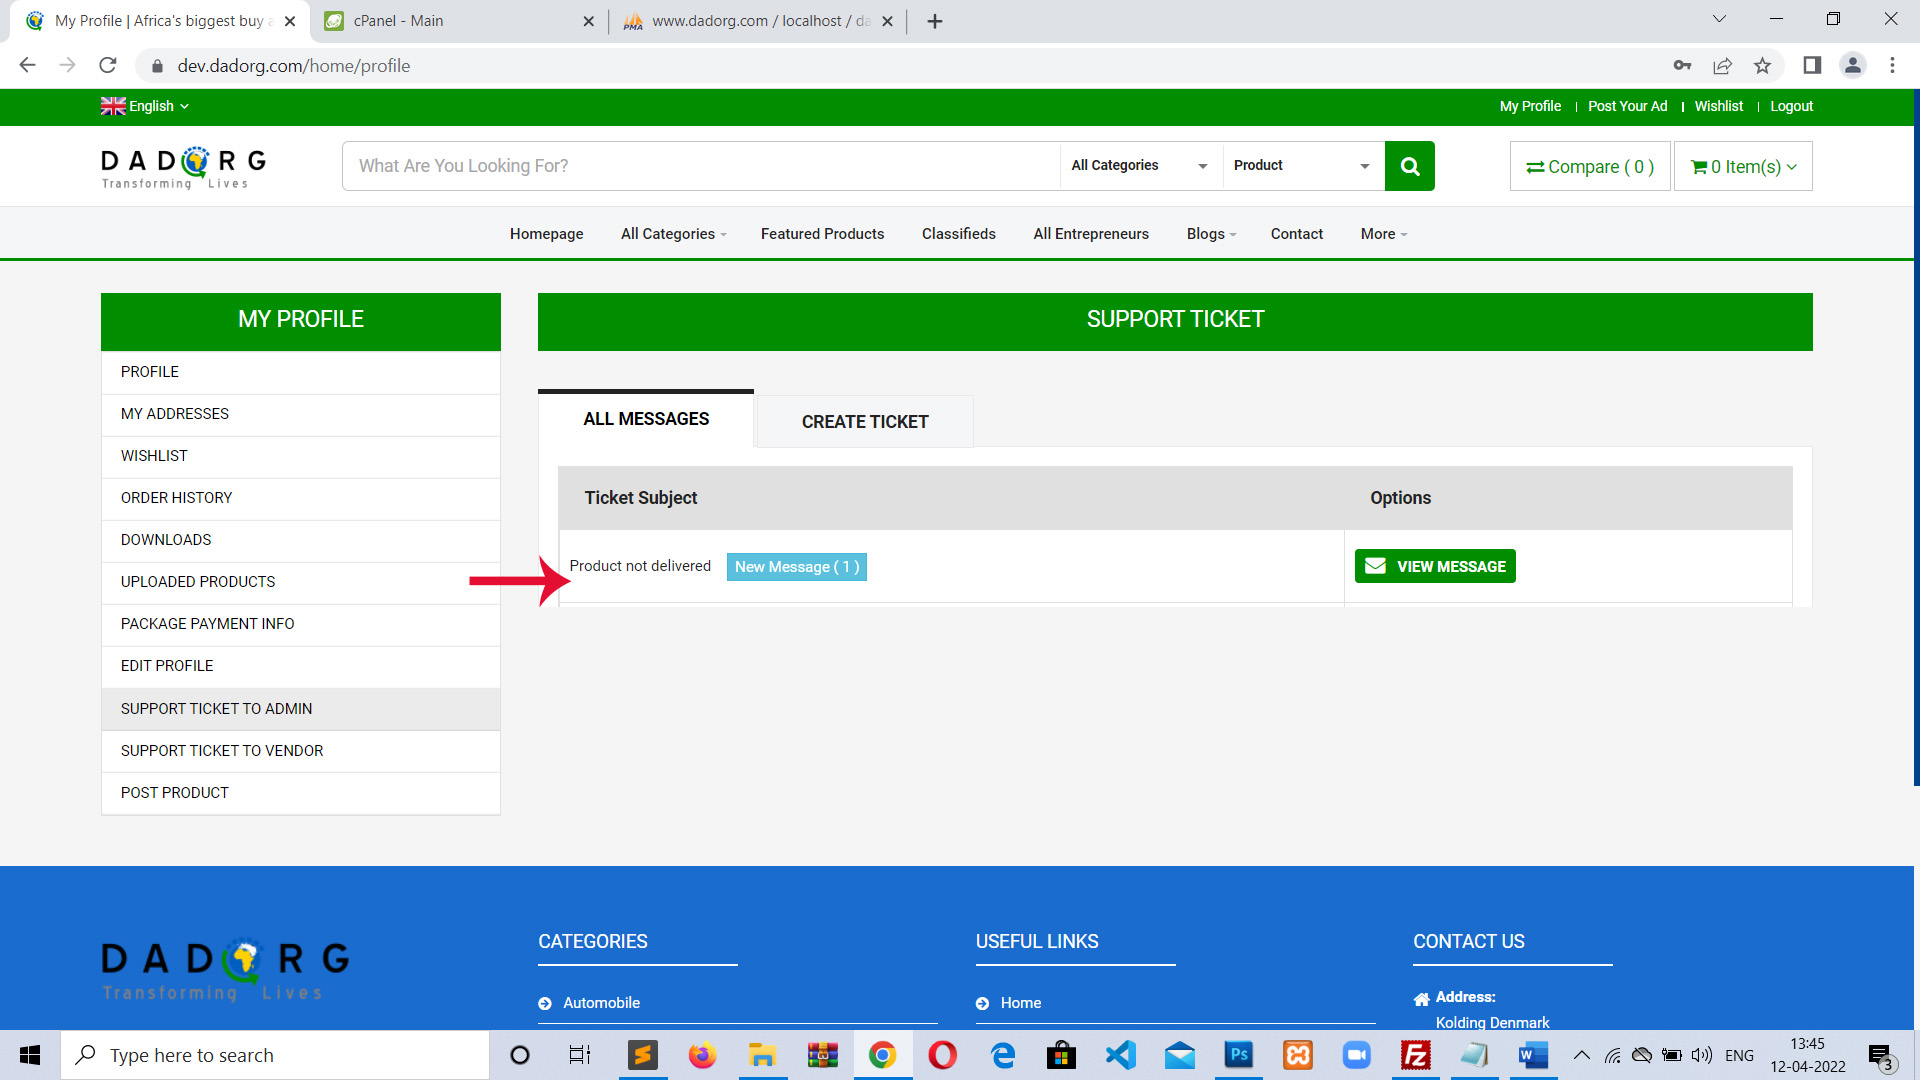
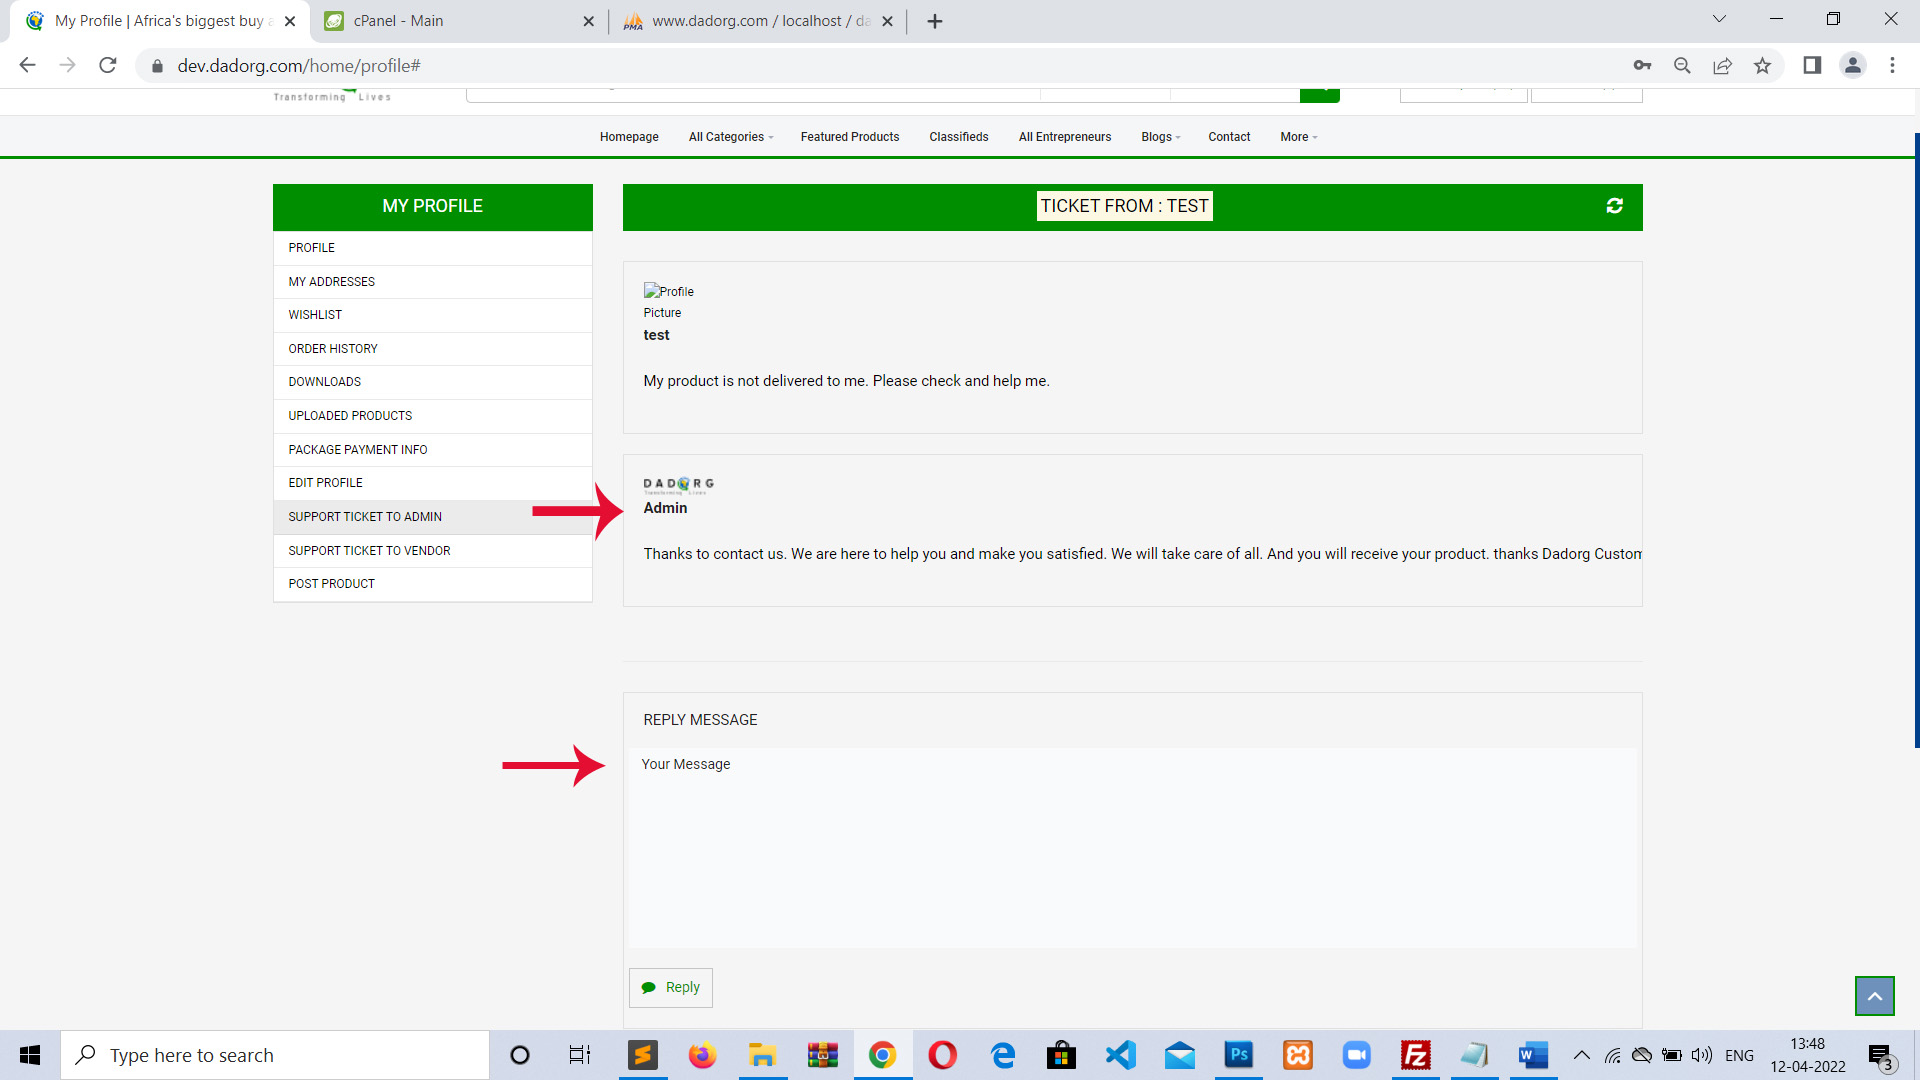
9. Support Ticket to Admin: In this section customer can post a ticket to Admin. If customer want to ask anything Then he can post ticket with his query to Admin and discuss here.
>> Under “All Messages” tab your all previous created ticket will listed.
>> To create new ticket click on “Create Ticket ” tab. And Fill all fields and click button “create”.

Now you can see all ticket messages listed under “All Messages” Tab.

>> When admin will reply to your message then you can see response like this. To see message click “View Message ” Button in right side.
>> Here you can see all conversation under this ticket message and also can reply.
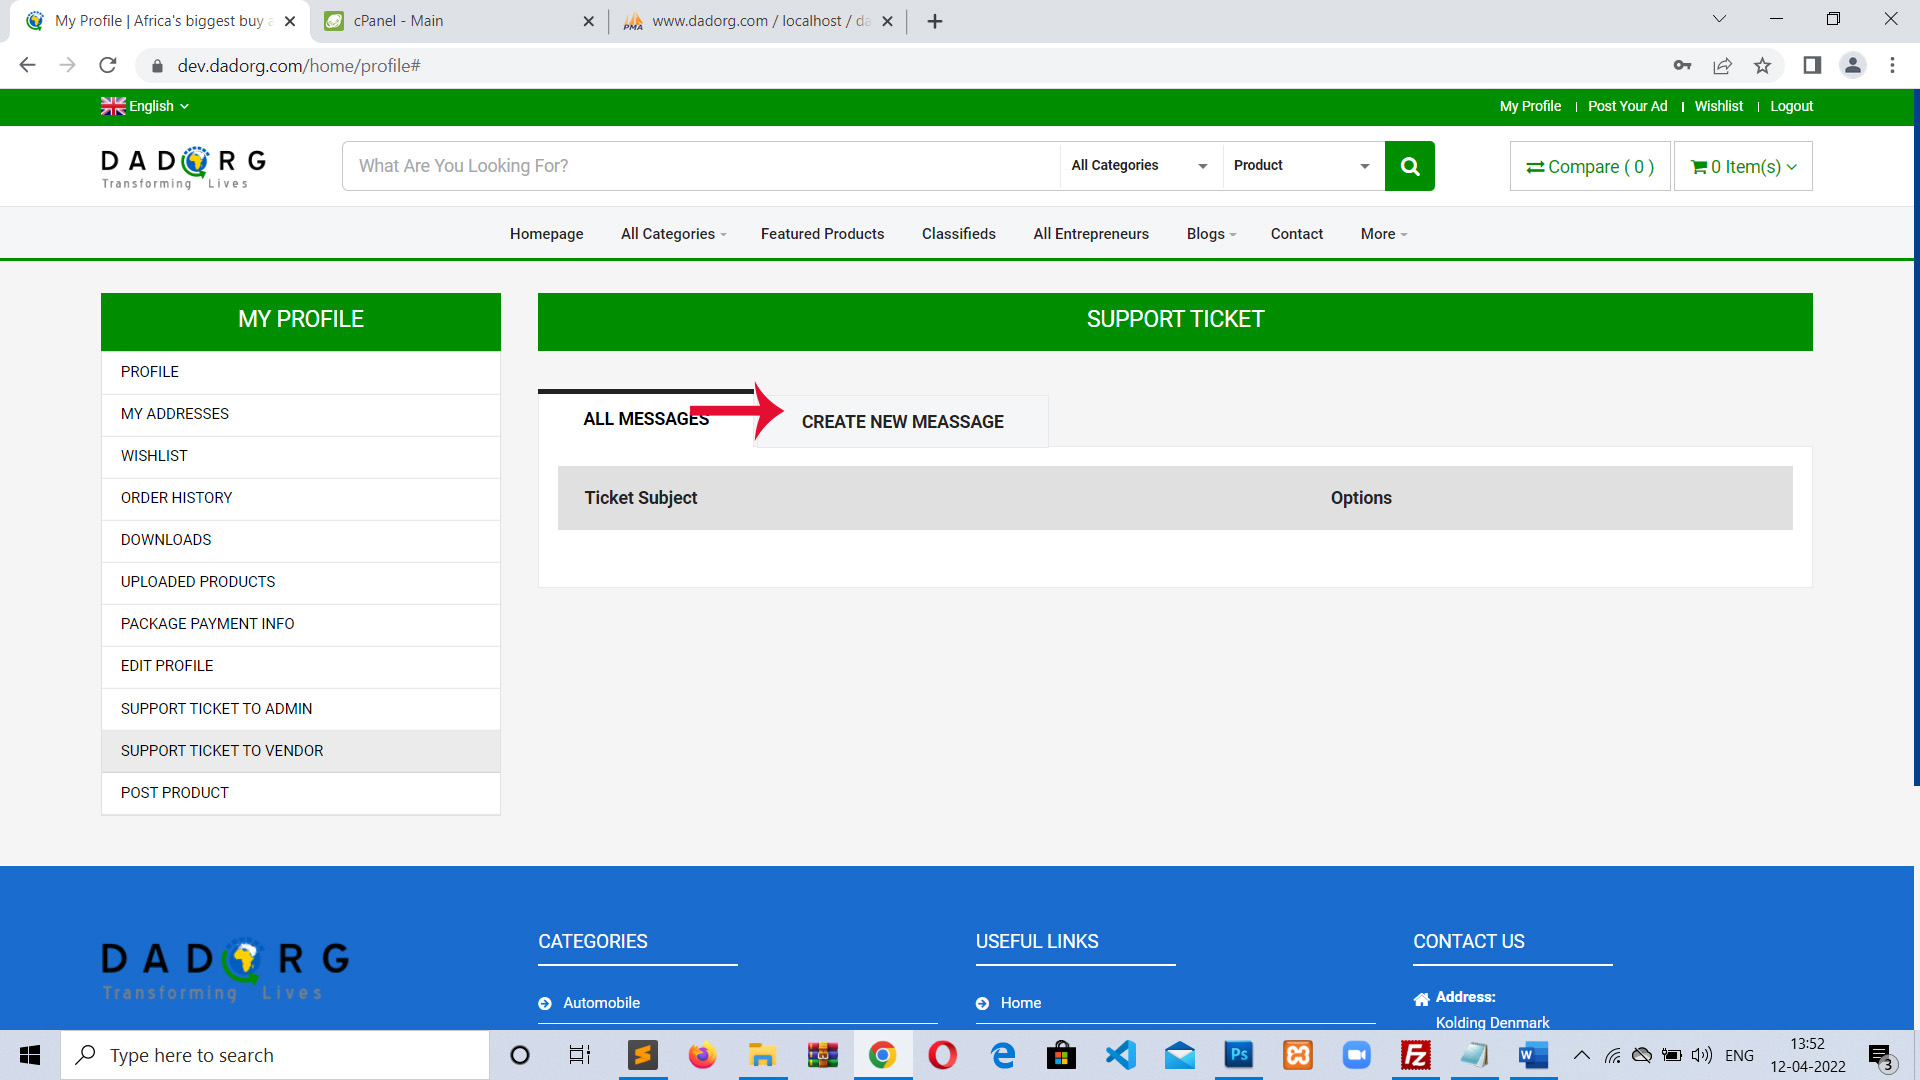
10. Support Ticket to Vendor: In this section customer can post a ticket to product’s Vendor. If customer want to ask anything regarding product. Then he can post ticket with his query to product’s vendor and discuss here.
>> Under “All Messages” tab your all previous created ticket will listed.
>> To create new ticket click on “Create Ticket ” tab. And Fill all fields and click button “create”.
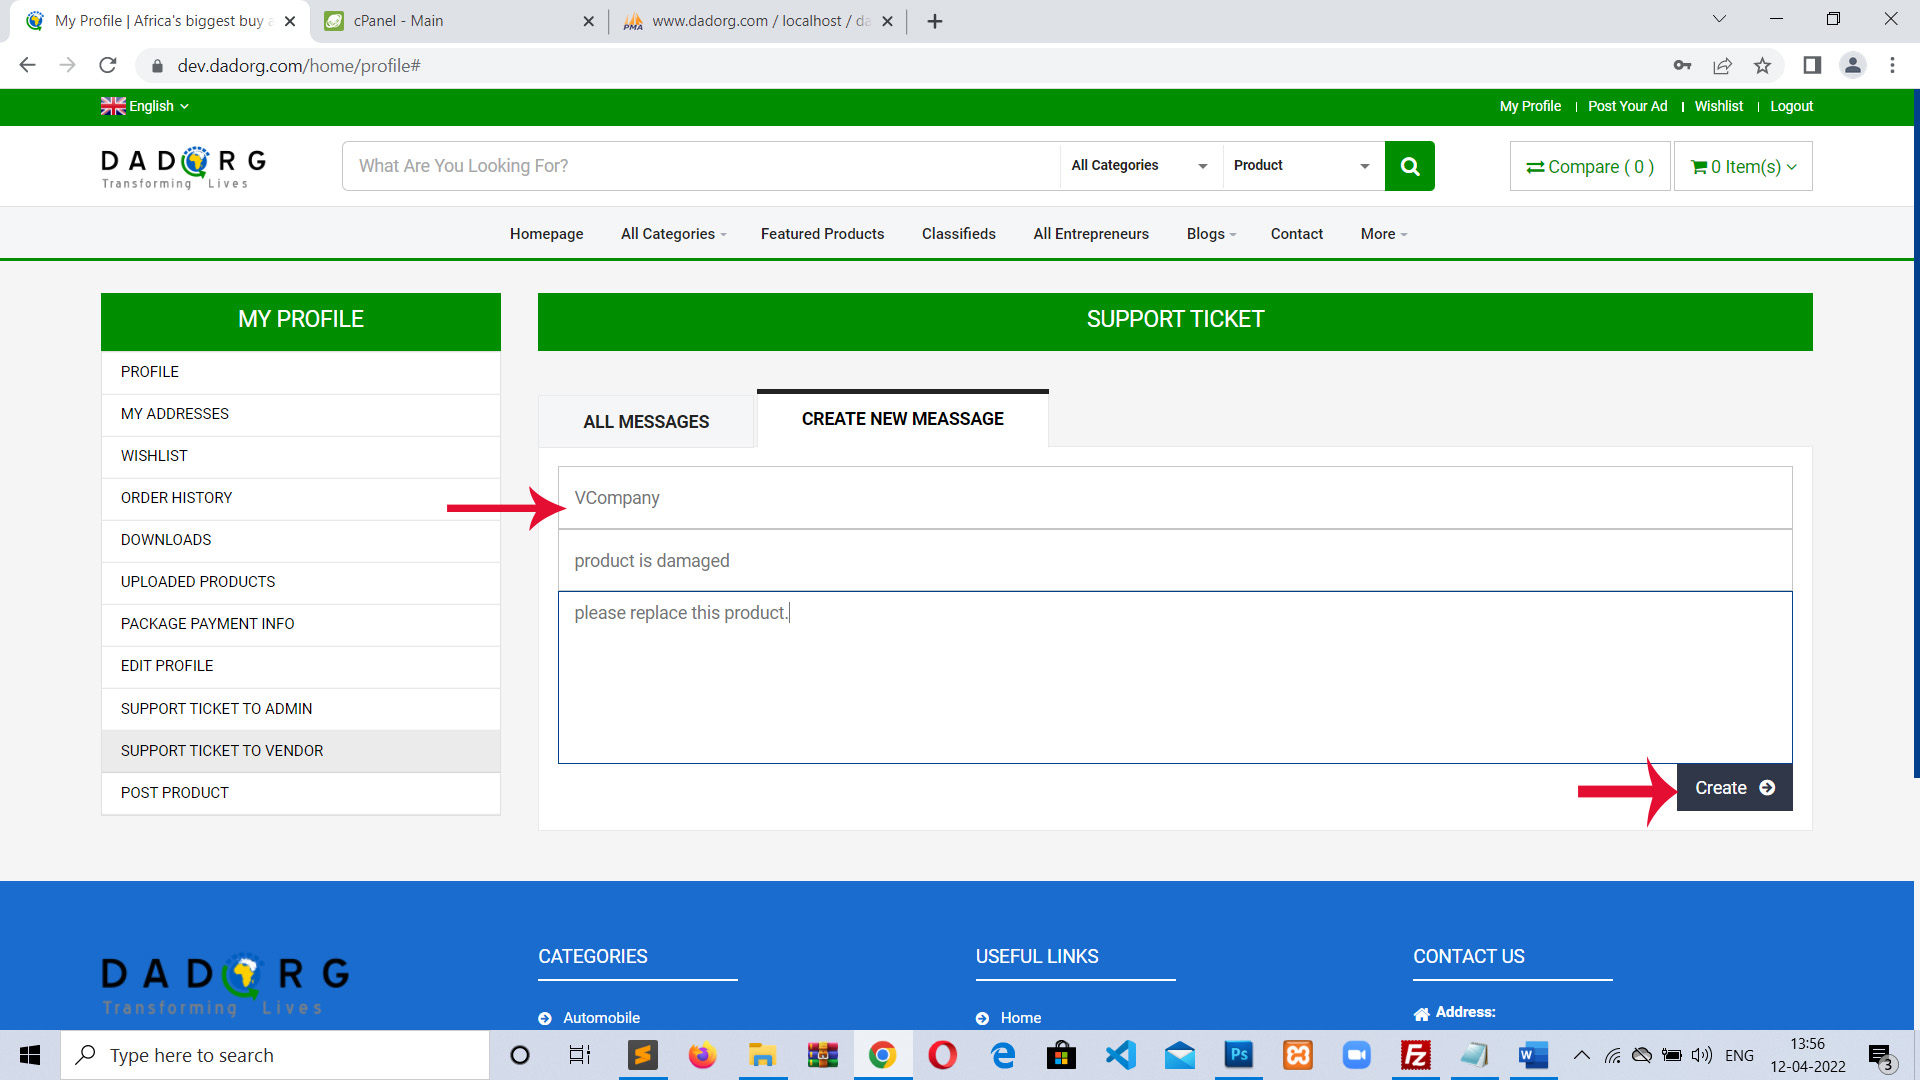
Here Select “Vendor” you want to send message and fill all fields and click create button.
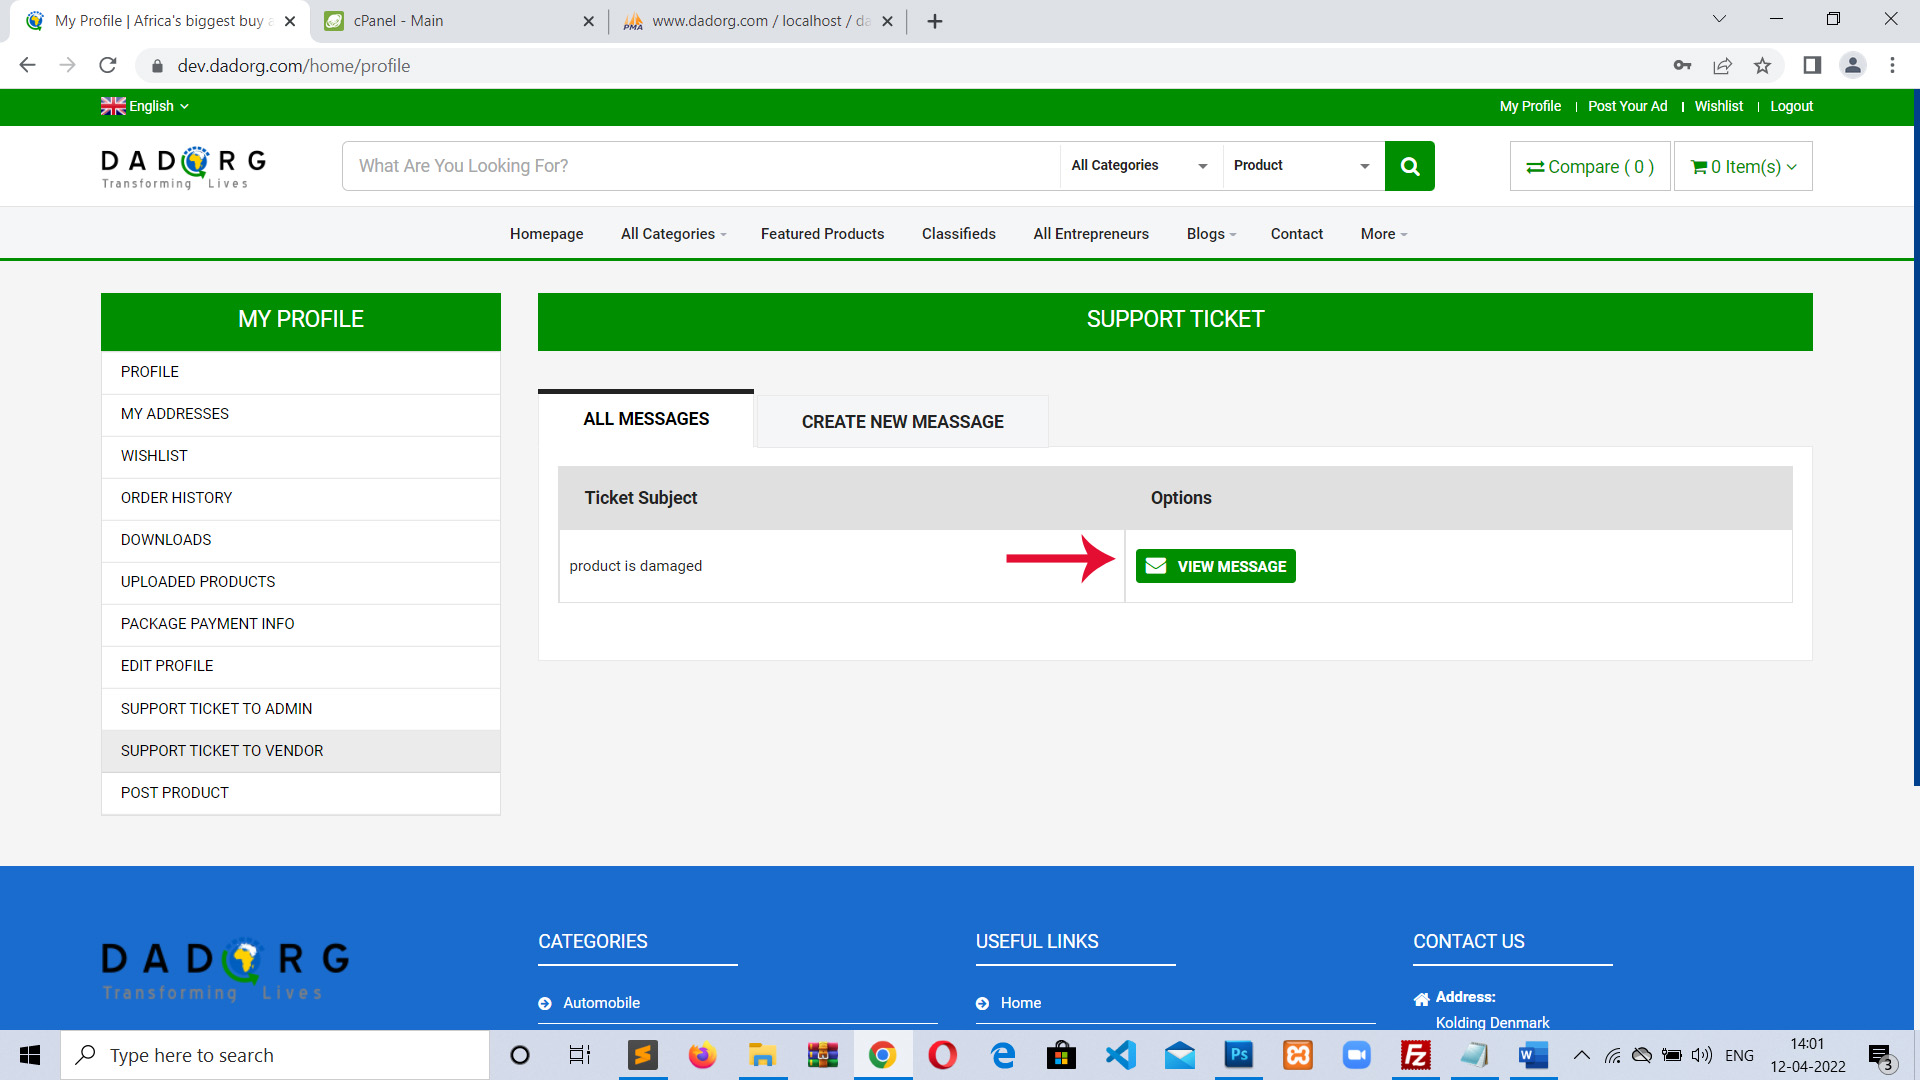
>> You can see the message and reply by vendor by clicking “View Message button.”
11. Post Products (Post an Ad): Here customer can upload his products. After taking a package to upload products customer can upload his products here. Initially 2 products can be uploaded free of cost. After 2 product when you will click on “Post Product” option you see screen like this:
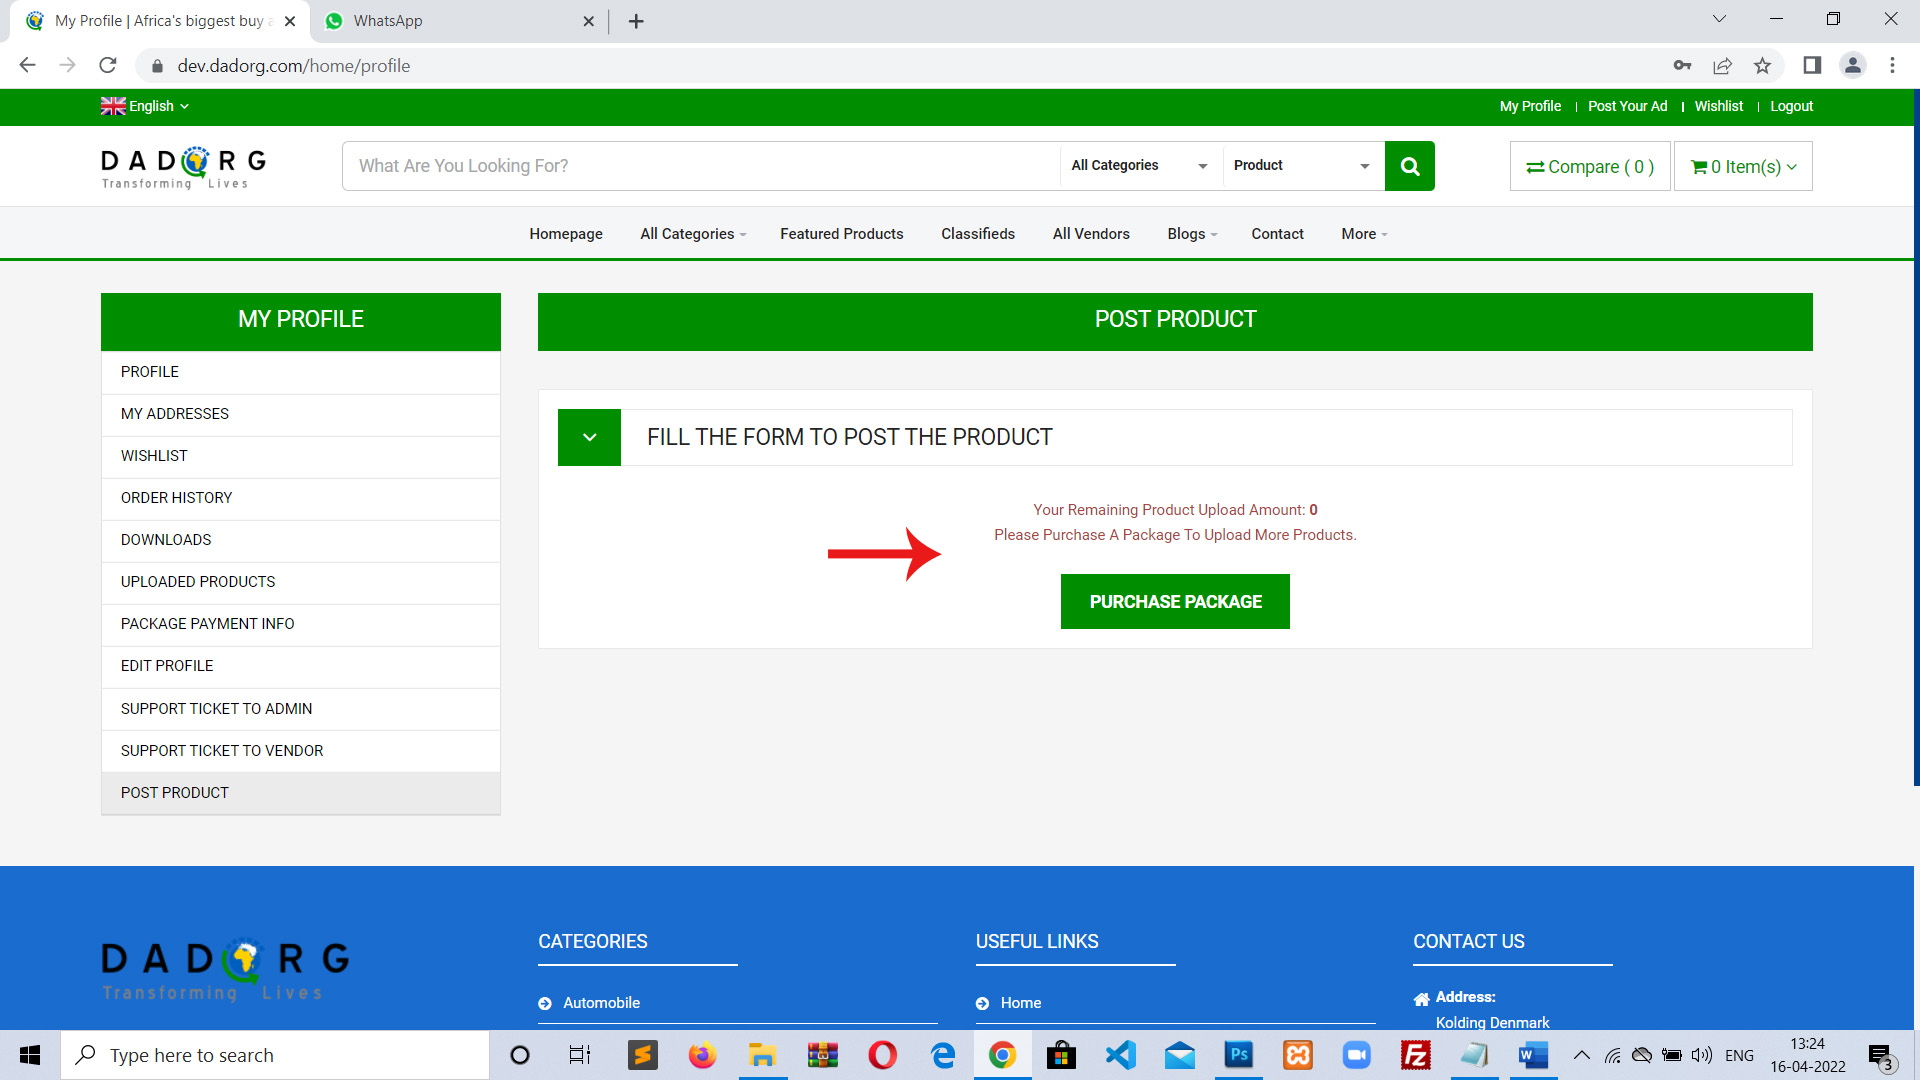
Now click on “Purchase Package” button and the next screen will be like this:
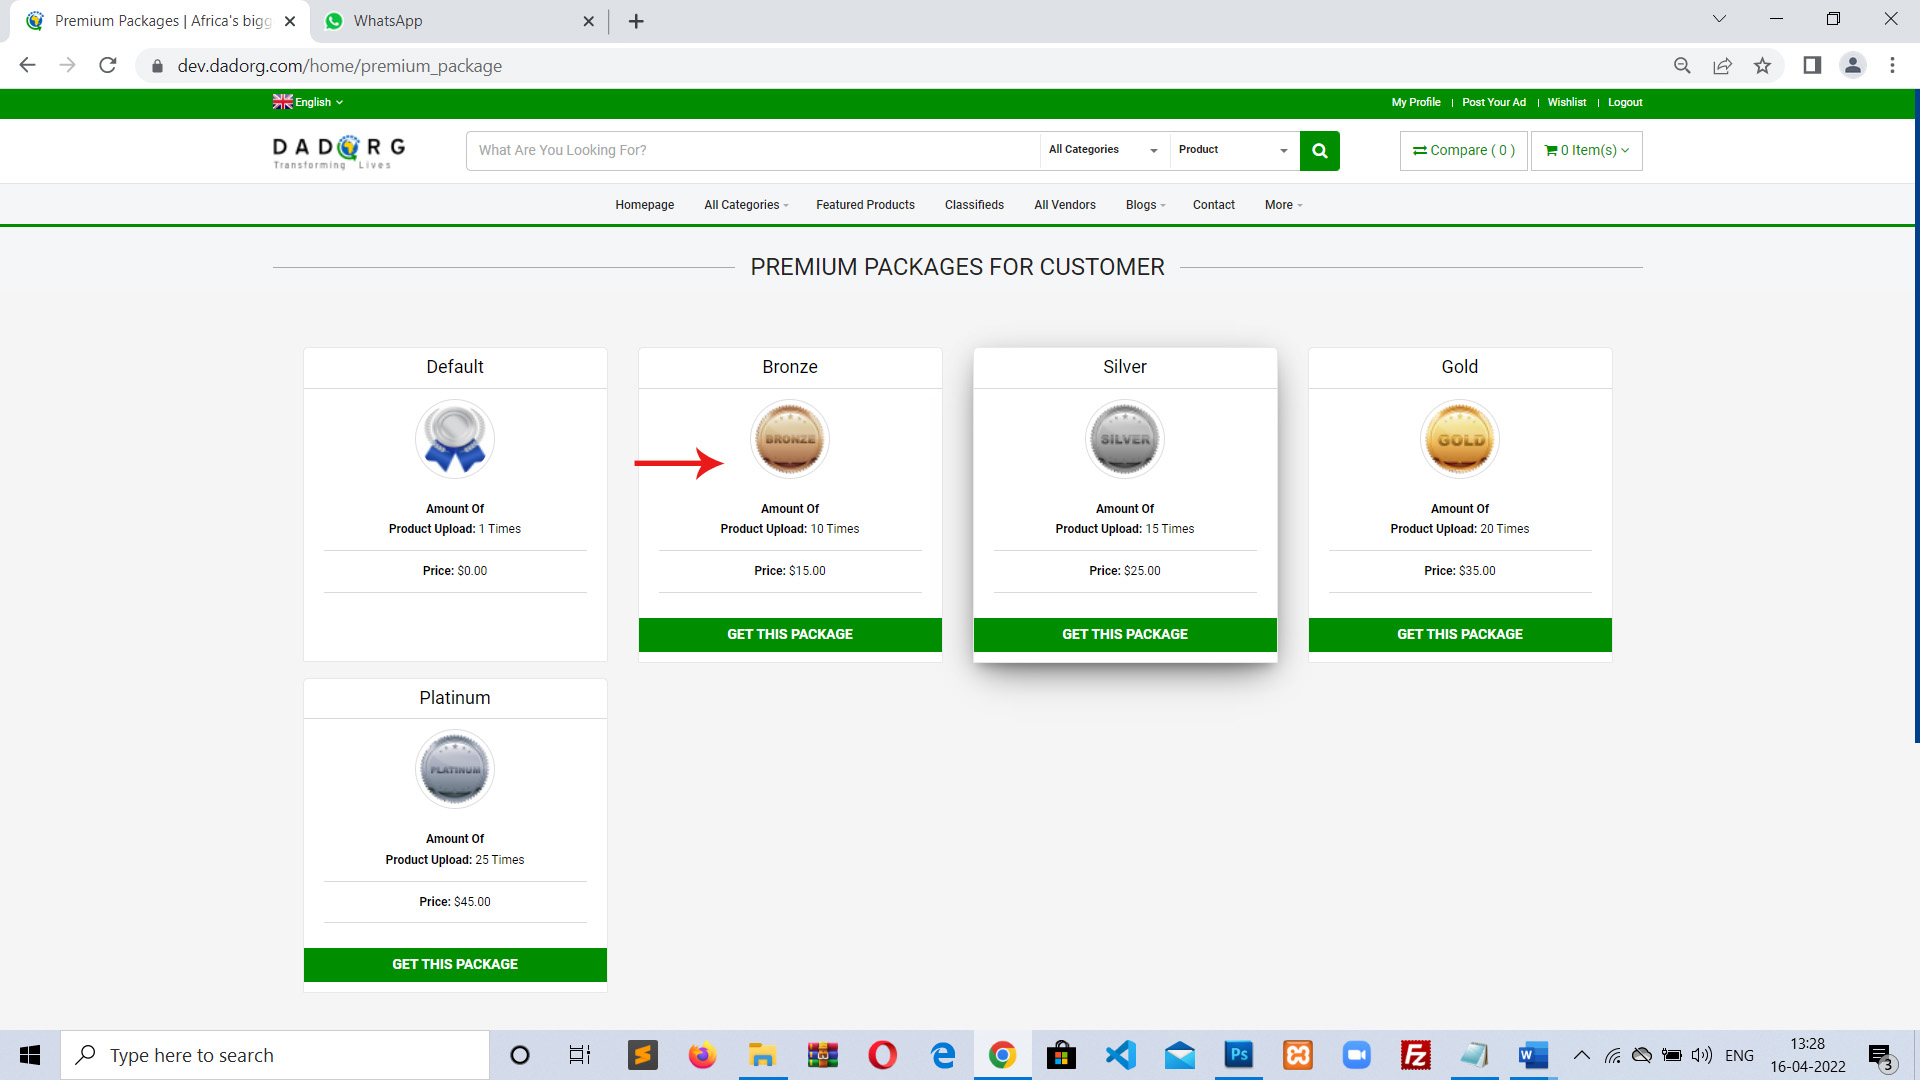
Click on any package to purchase it. And complete the payment process.
How to Make An order ( Or Purchase Product )-
There are 2 types of products on dadorg.
1. Vendor’s Products: Products posted by different Vendors/ Sellers/ Companies are called Vendor’s Products.
2. Customer’s Products: Products posted by Customer are called Customer’s products. All Customer products can be seen under classified products section. You can see classified section on home page and also can navigate from menu navigation.

AND

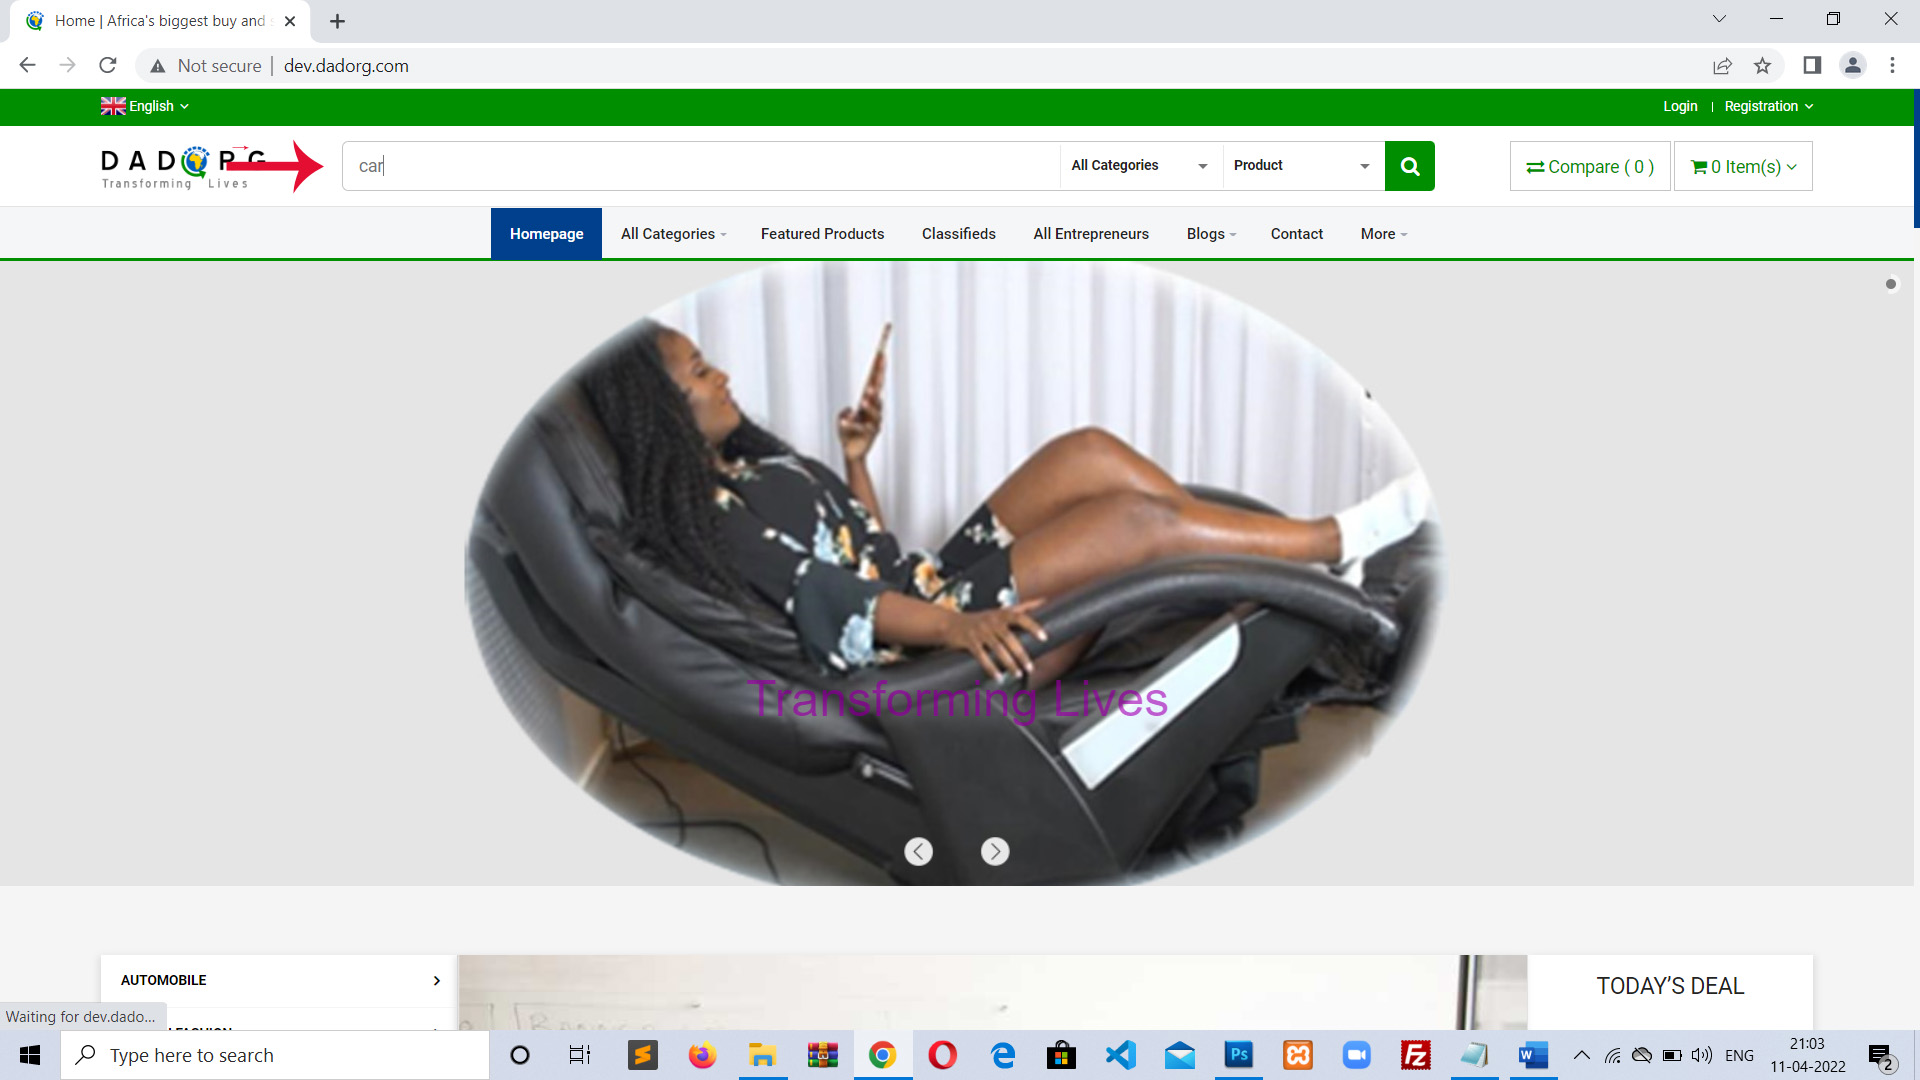
3. Purchase a Vendor’s product: We are explaining the process by purchasing a car for example. So now suppose I want to purchase a car then from home at top type “car” search section. OR you can go through category -> Automobile -> car
>> Next screen will be something like below. Now click on product to view it’s details

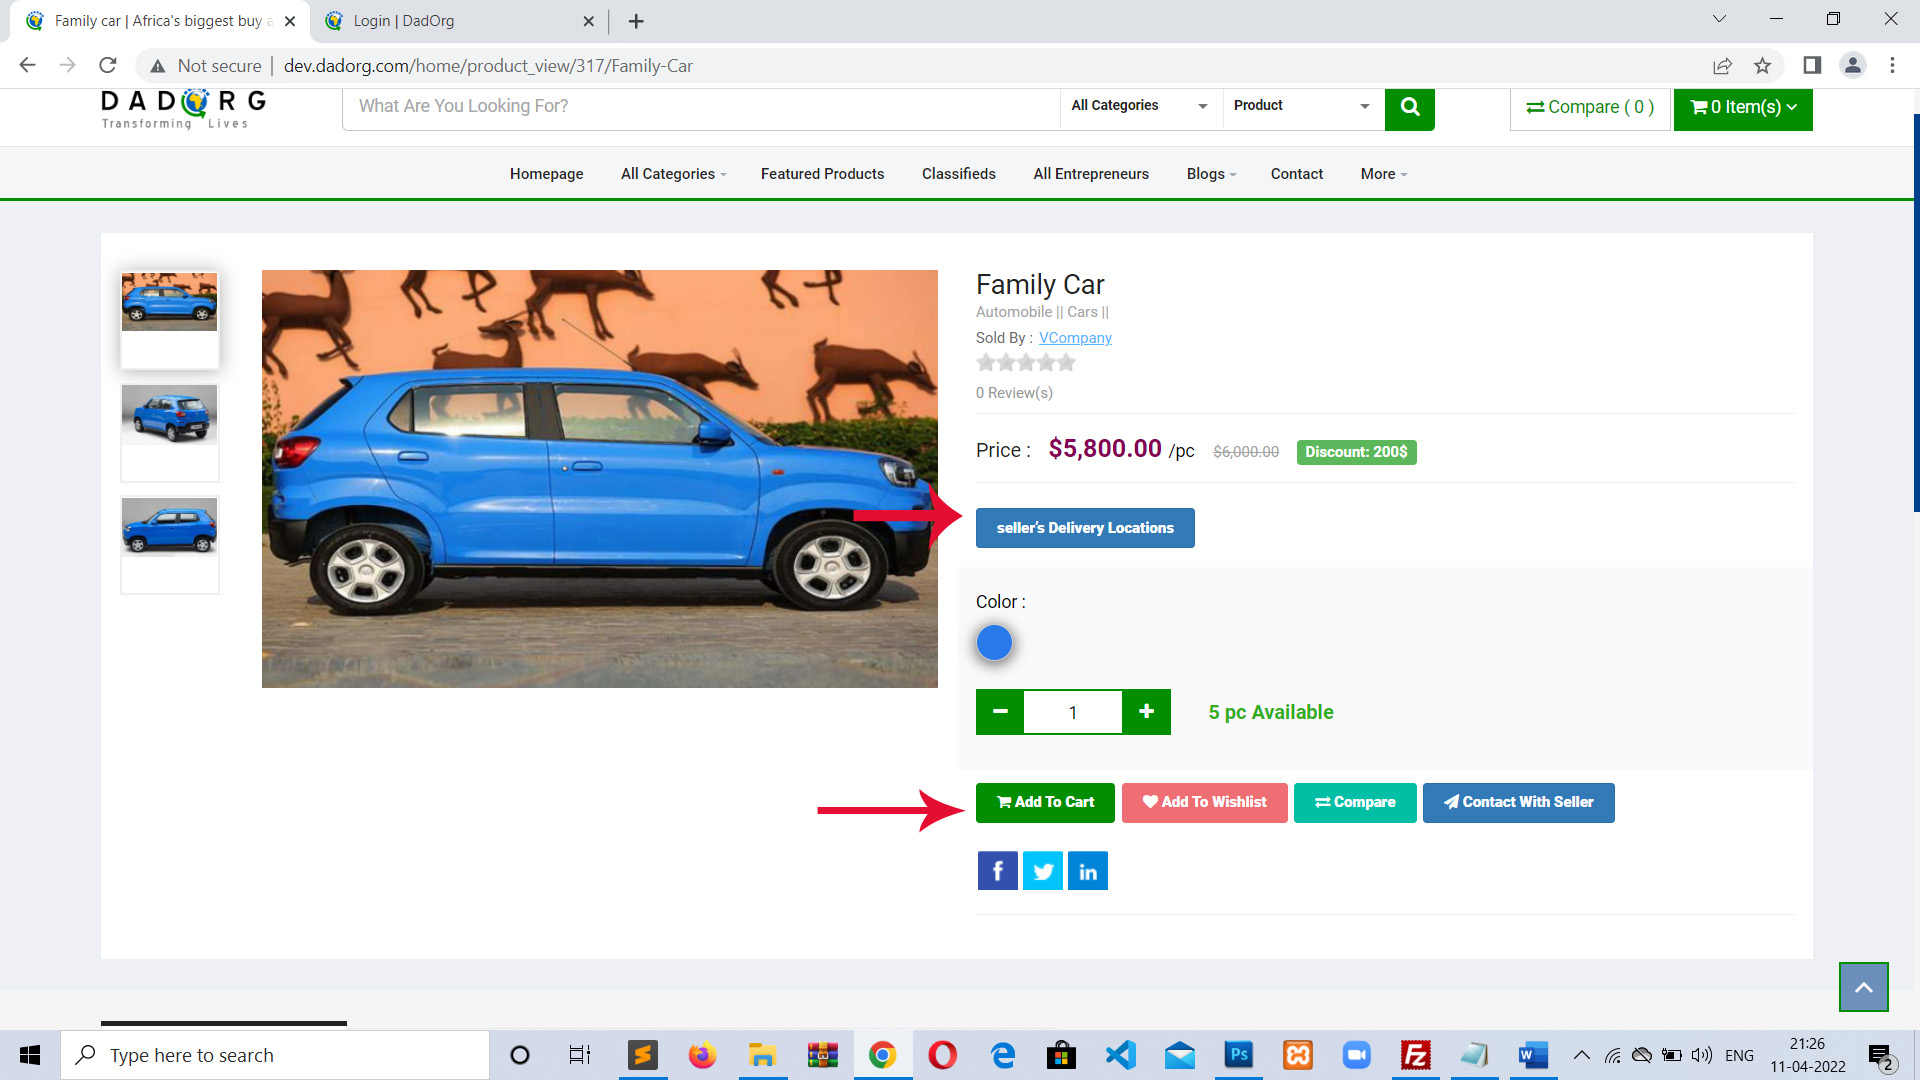
>> Next screen you will see all details of product (car). Here from “Add to Cart ” button you can add product to cart and item will added to cart and will be visible at top right under items dropdown.
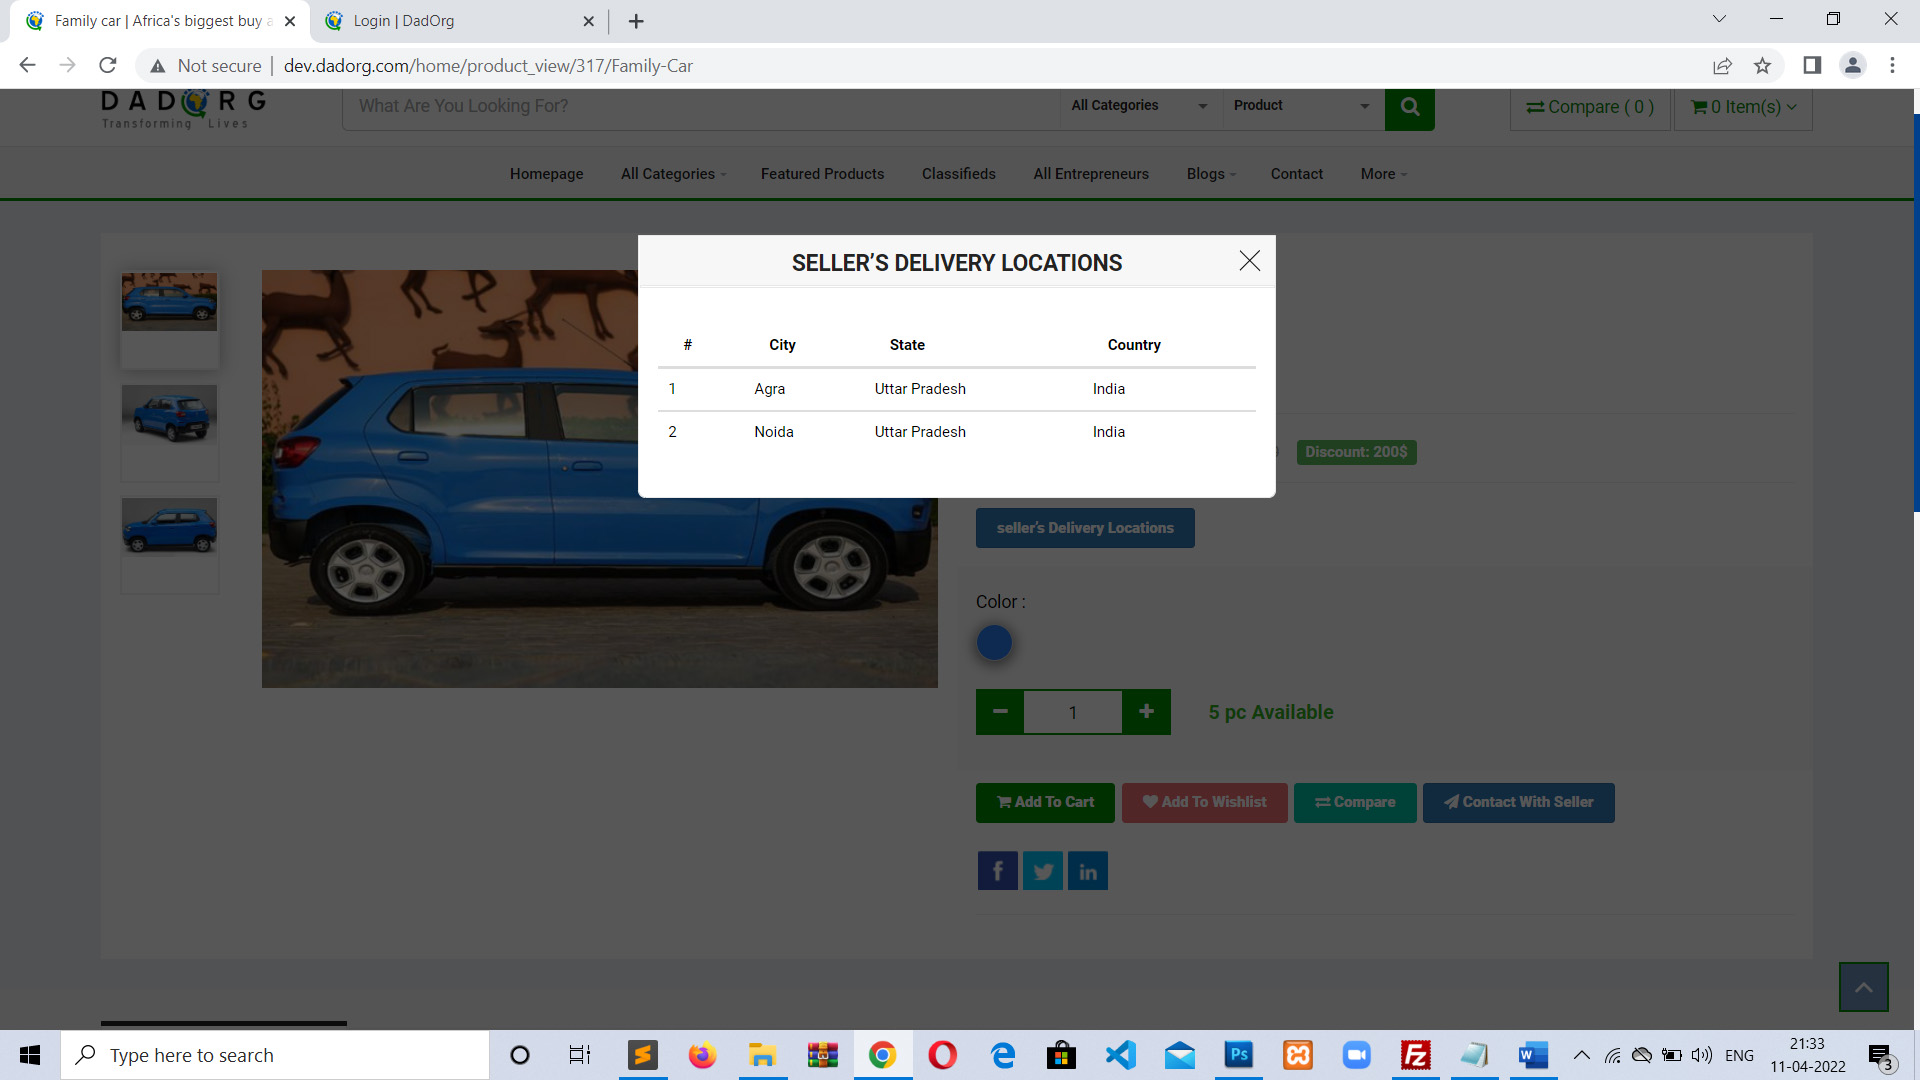
Here you can see there is a button “Seller’s Delivery Locations”. By clicking this button you can see seller’s delivery locations.
>> Next screen When you click on a button “Seller’s Delivery Locations”. You see a list of delivery locations provided by vendor/seller of this car. It means you address location should match vendor’s/seller’s delivery location range. If your address location does not match with vendor’s/seller’s delivery location then you add another address if you can manage to receive the product at that location.
>> Now lets go to purchase this car. Click on “Add to cart” button. After clicking “Add to cart” button item will added to cart and you can check and click on “checkout” button to purchase it.

>> After clicking “checkout” button next screen. If are already login then this screen will not come and if you are not logged in OR does not have an account then you can “Sign In” from here and if not have an account then click on “Sign Up Now” link.
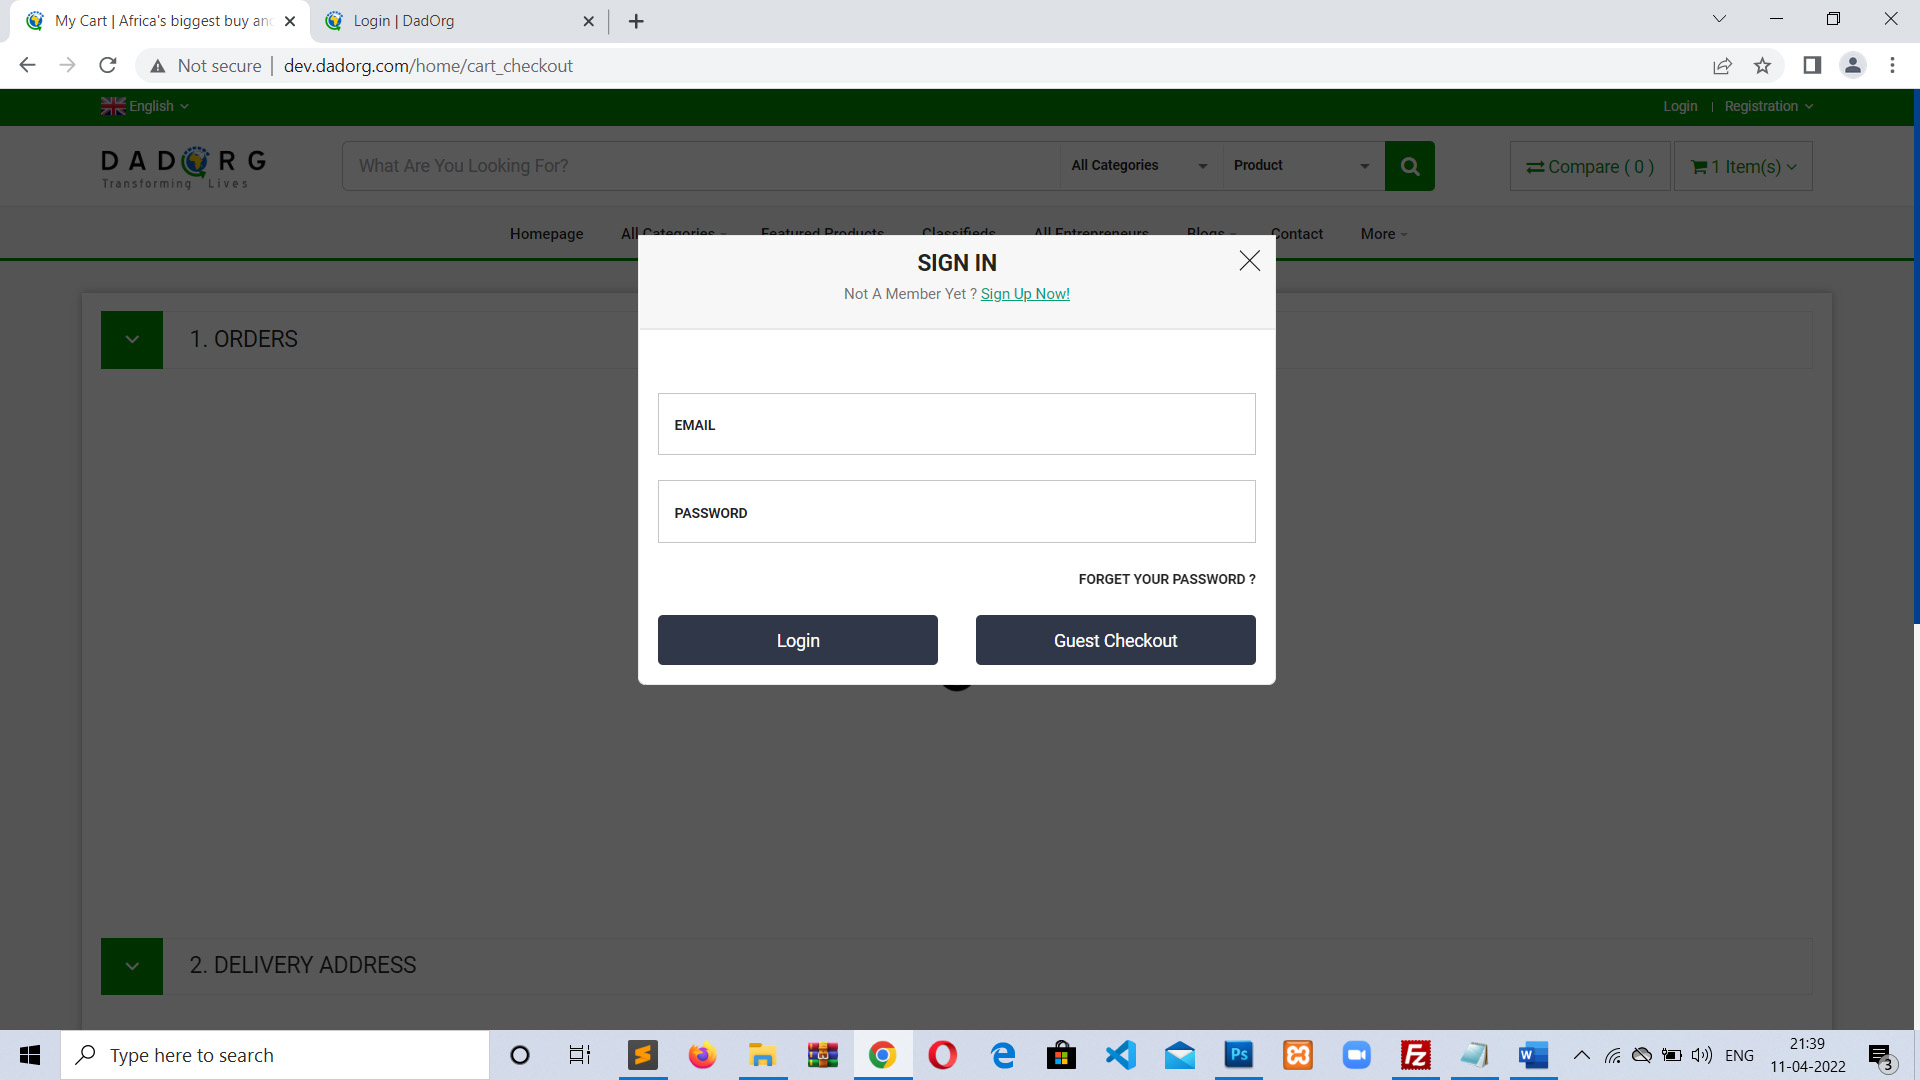
>> Login with your login credential email and password. Then next screen is here.

This checkout screen here you can see total paid amount with tax and delivery charges. Here there 3 sections:
A) Orders- all the details (price, quantity etc) of product
B) Delivery Address: Detail of address and mobile no where this product will be delivered. Also on this page customer should check all address details. If anything is incorrect then customer can go back or go to his profile to update details before purchasing.
C) Payment Options: There 3 payment options:
1: Paypal- If you have an Paypal account then you can go through options
2: Stripe: If you want to use any bank credit card then you select this option.
3: Cash on Delivery: If you don’t want to use above 2 option then you can select this options and can pay at the time of delivery of product.
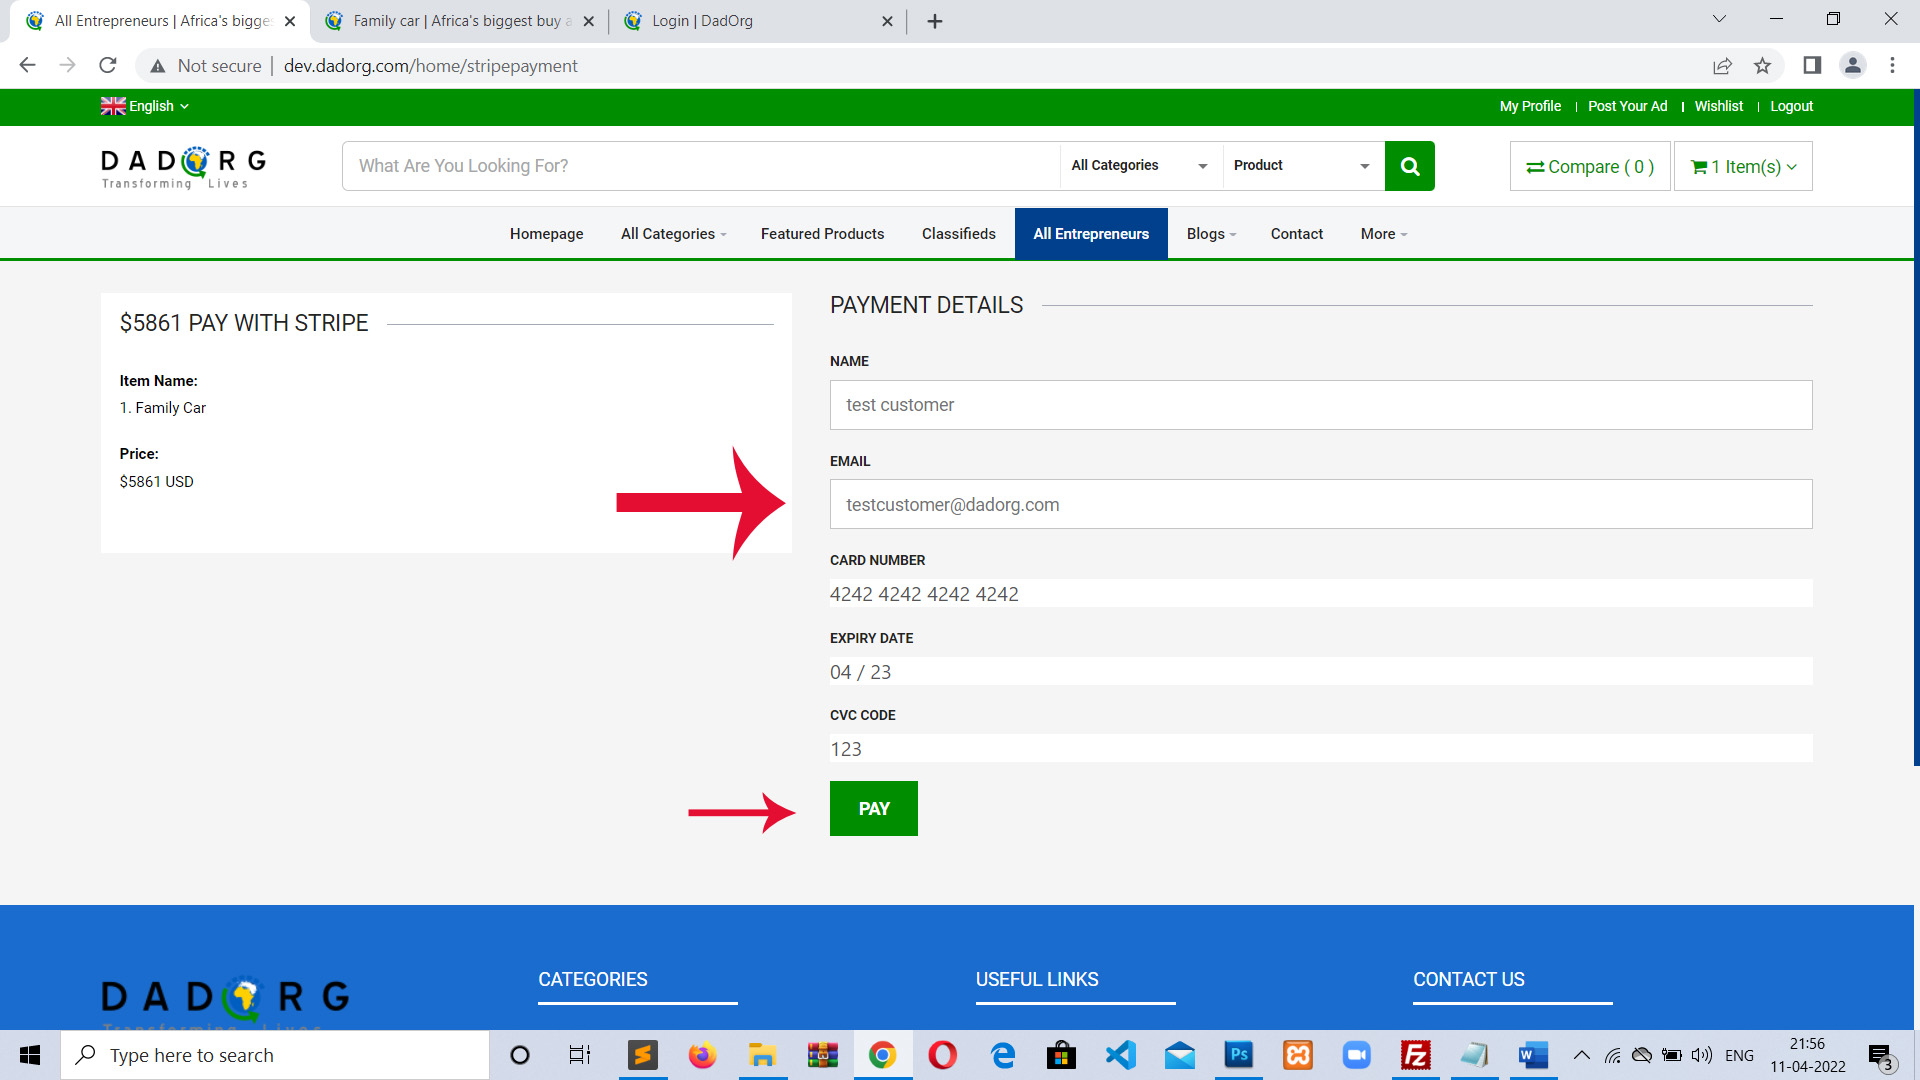
>> On previous screen you see I selected “Stripe” payment option to pay then click on “Place Order”. Next screen is for fill card details. Fill your name, email and card details (Card no, expiry date of card & CVV no) and click to pay.
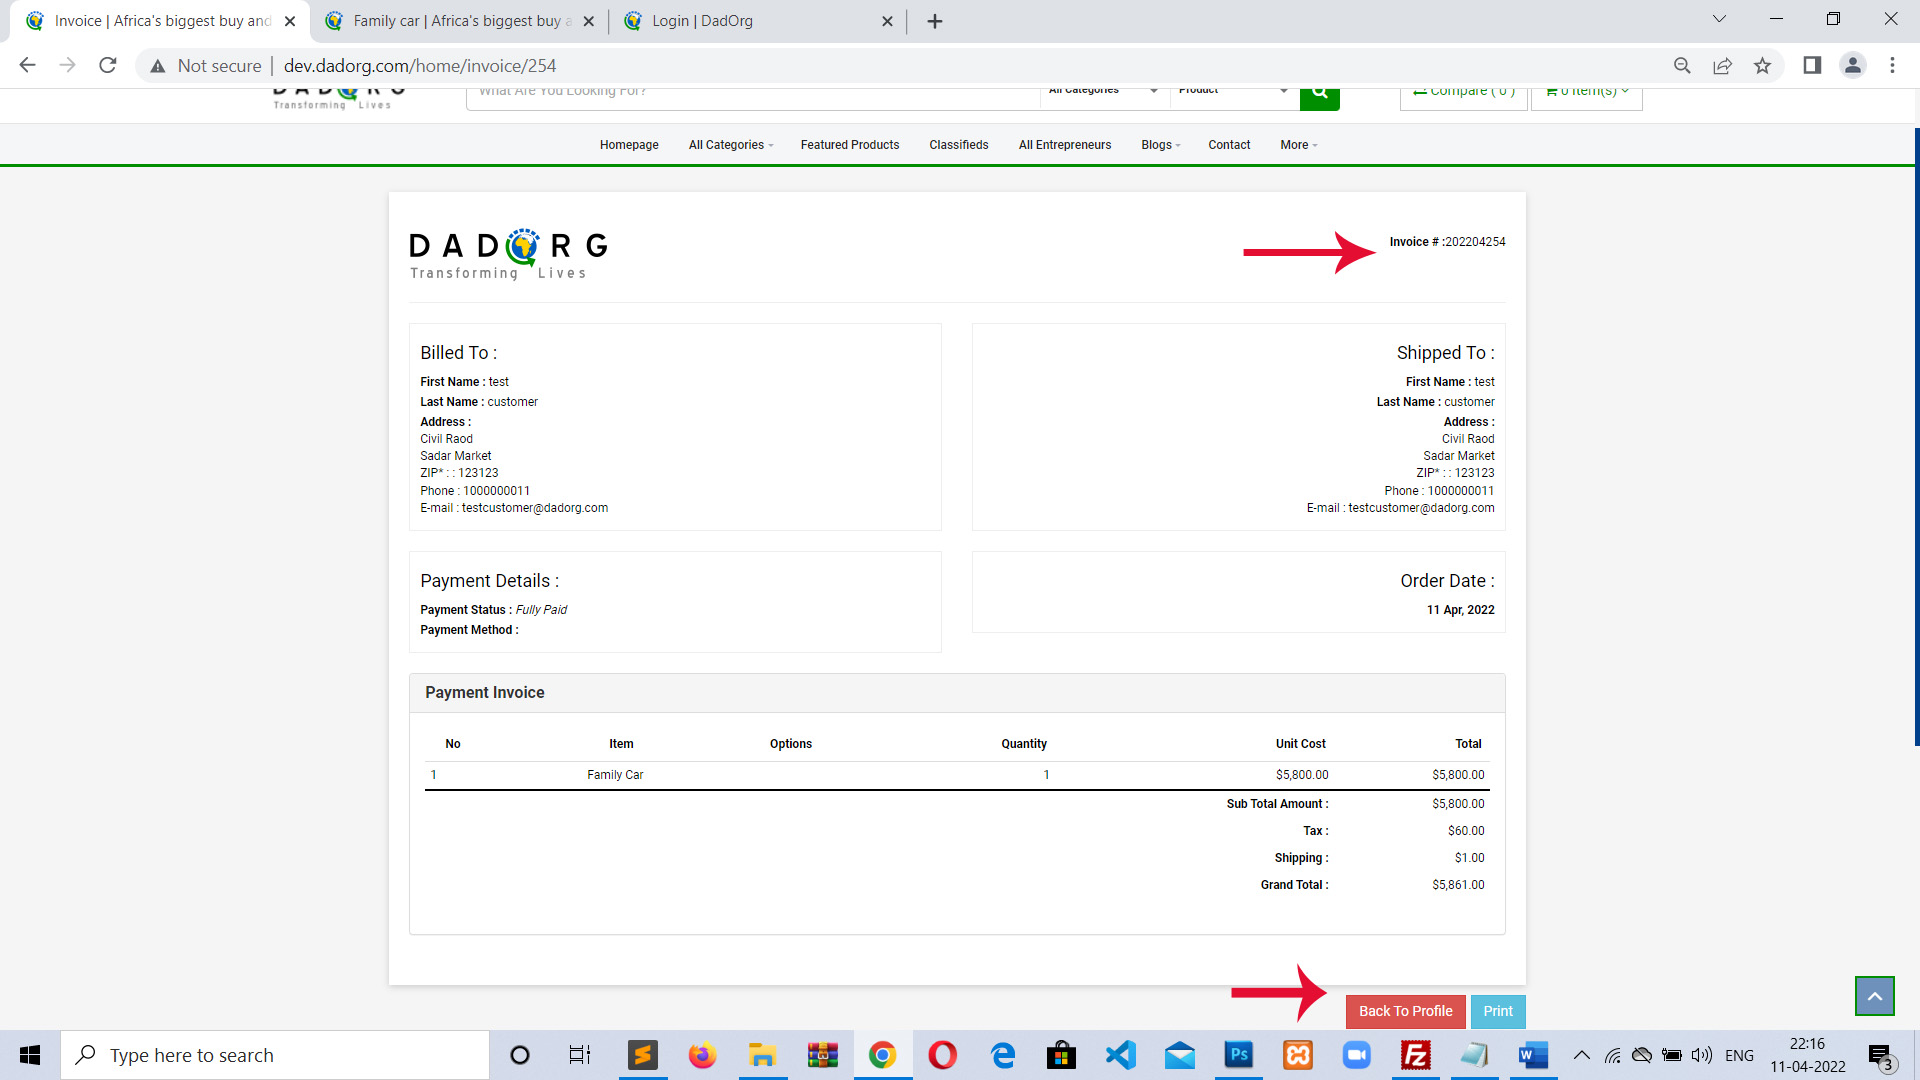
>> Next screen, after successful payment you will see next screen with invoice of order details. Here you can see details of your order and invoice no. By this invoice no you can track your product status. And at button you can see 2 buttons “Back to Profile” & “Print”. So you can print this invoice and go back to profile page.
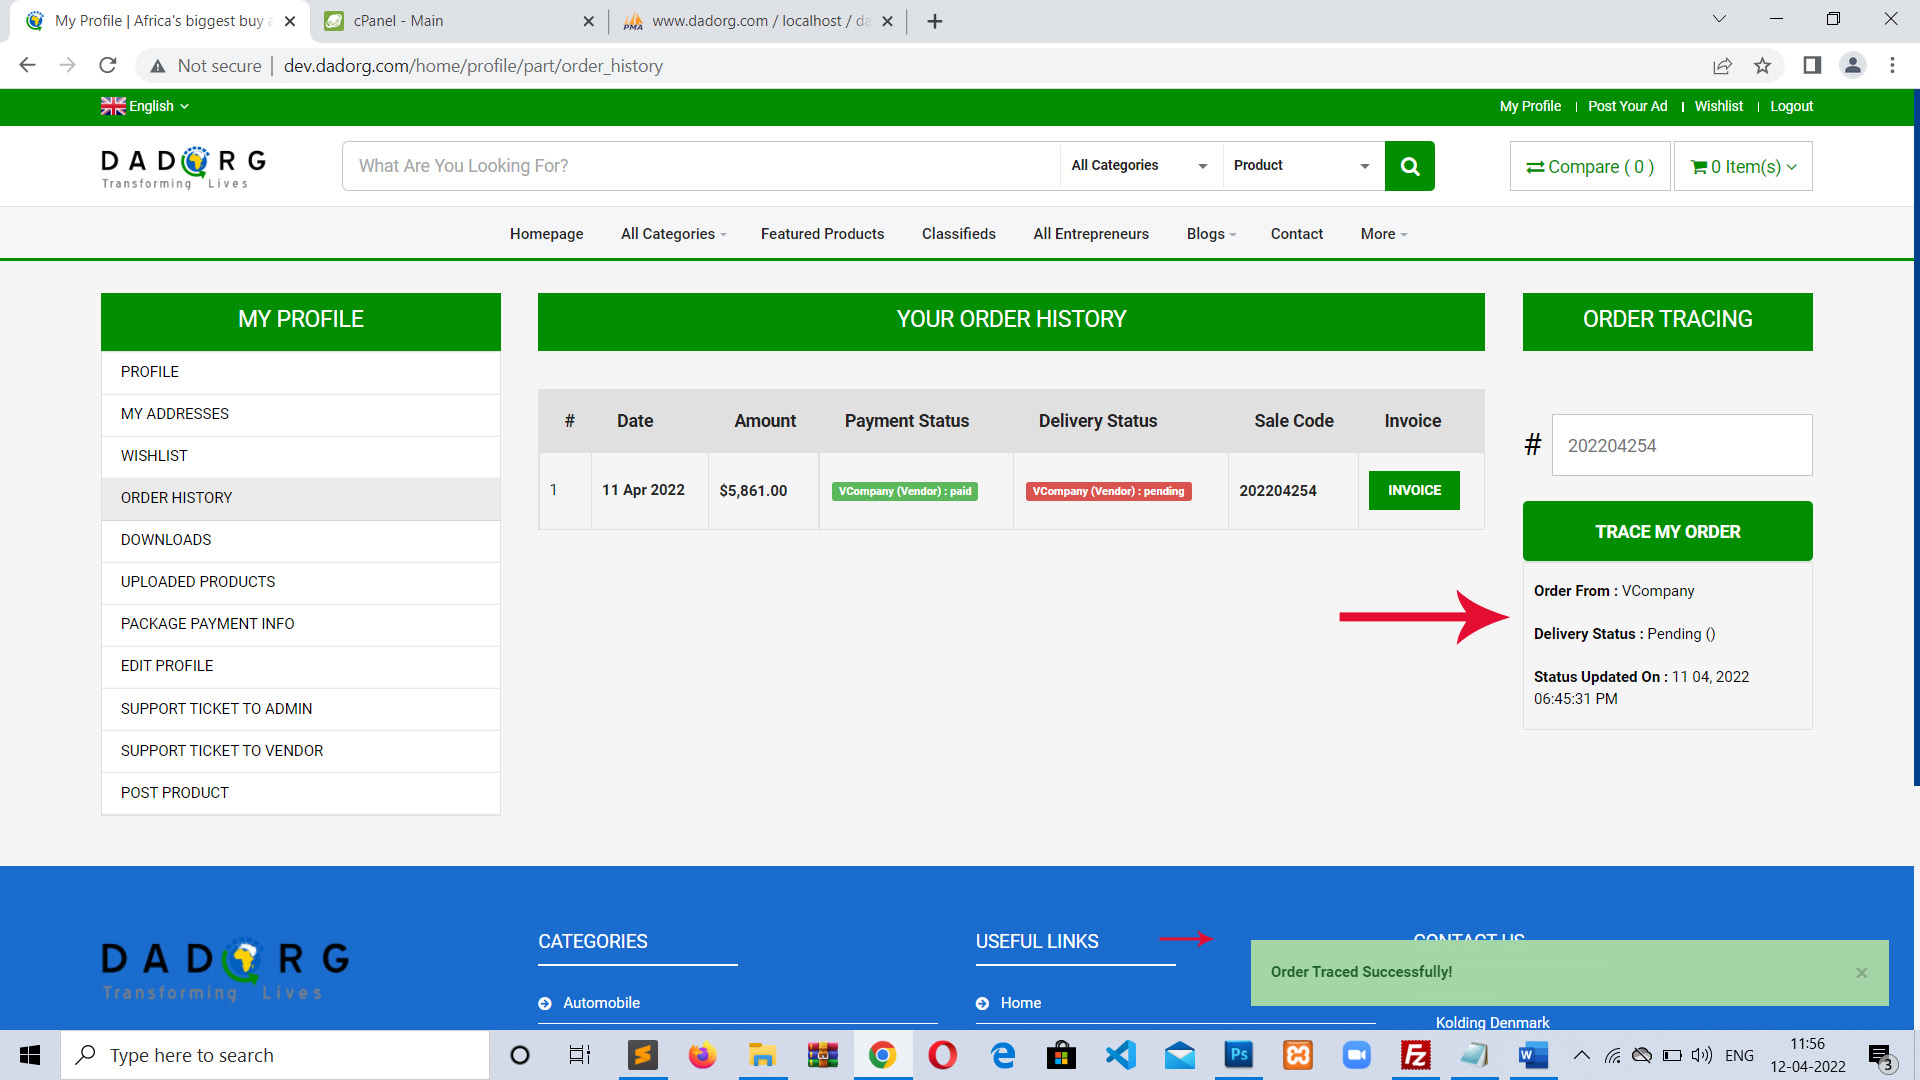
On your profile page under order history, you can see this order. You can see payment status, delivery status, sale code etc details. You can also trace your order by putting the sale code in right section and click button “Trace My Order”.
To see full invoice you can click “Invoice” button.
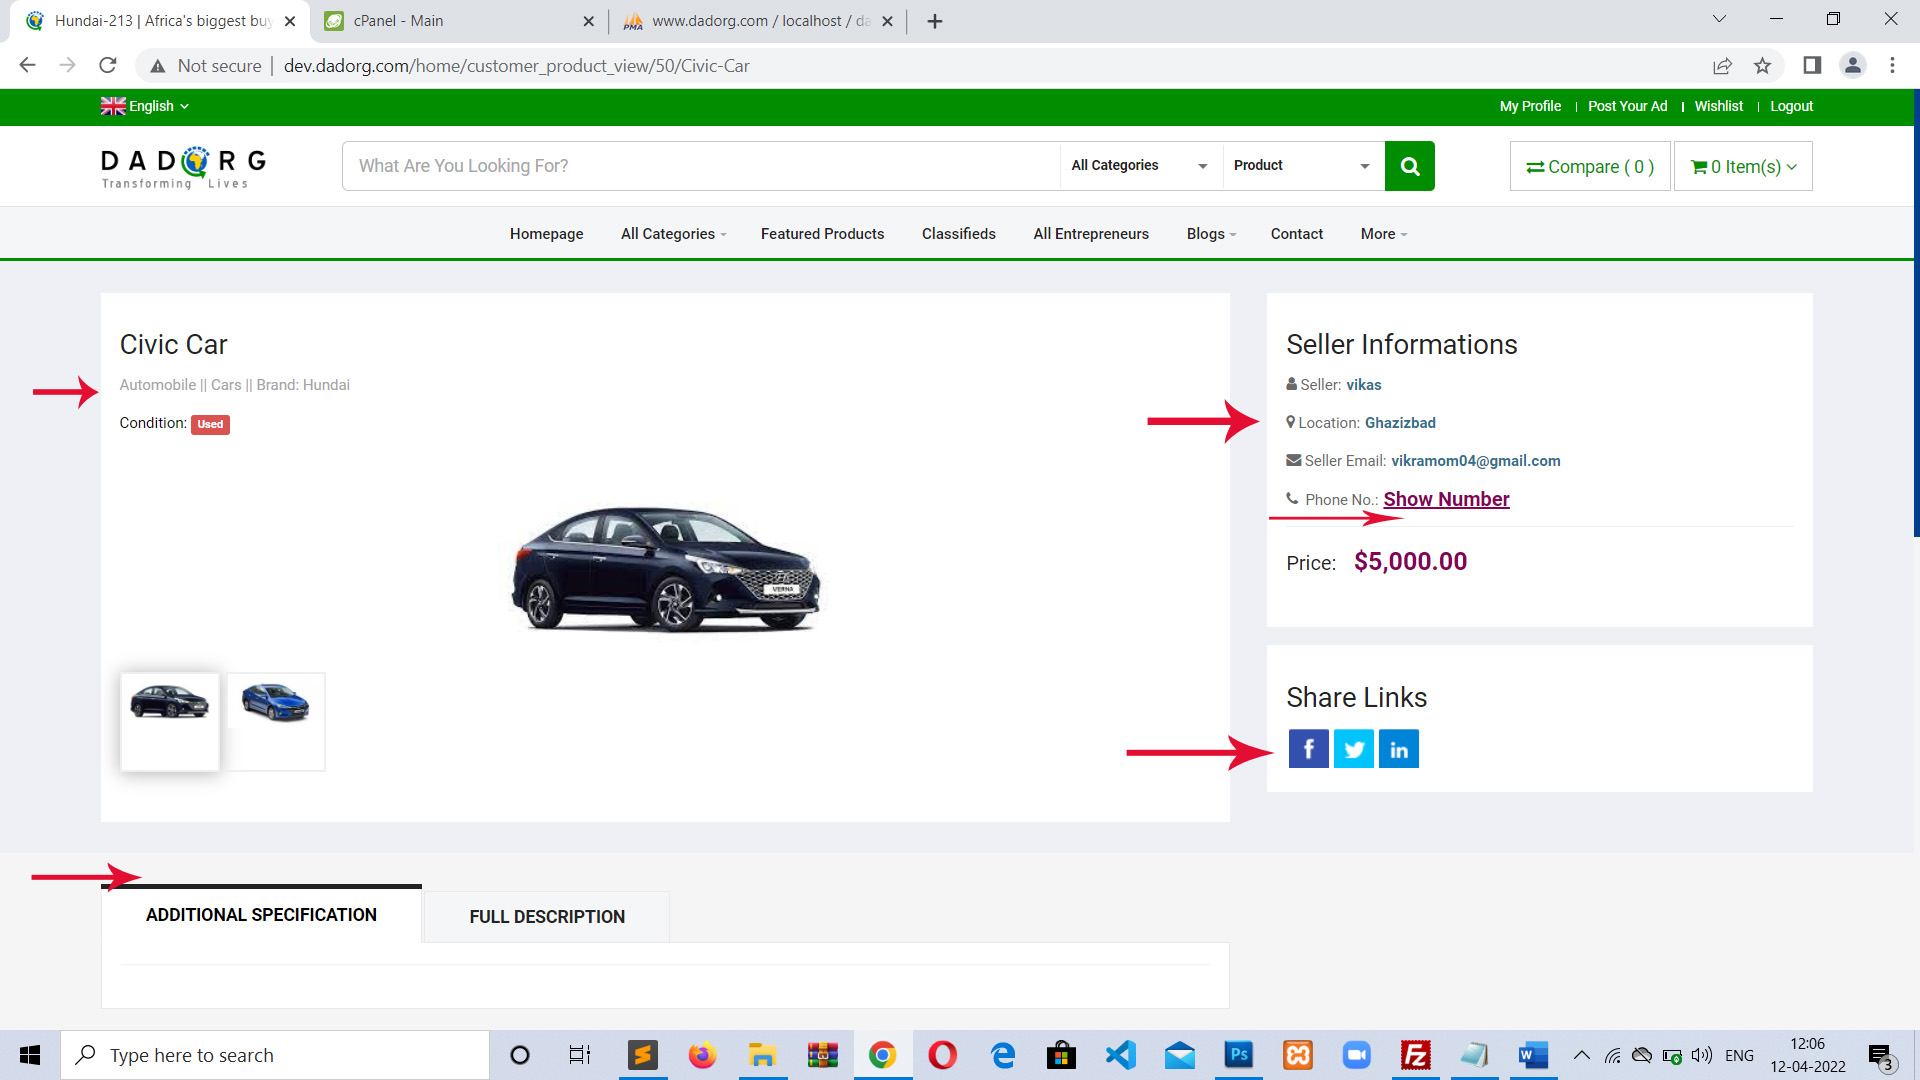
4. To Purchase a Customer Product: To purchase a product posted by customer no need to make an order. Just go to customer product page and select a customer product.
Customer Products

For example, I clicked on “Civic Car” product. Next screen:
>> Here you can this product category, brand, condition in top left and in right side you can see seller details name, email, location and see his contact no by clicking “Show Number” link.
>> So here no need to make an order you can directly contact the seller and discuss regarding this product and delivery.
>> You can also share this product to social medium facebook, twitter & linked in.
How to Post an Ad ( Or Post Product )-
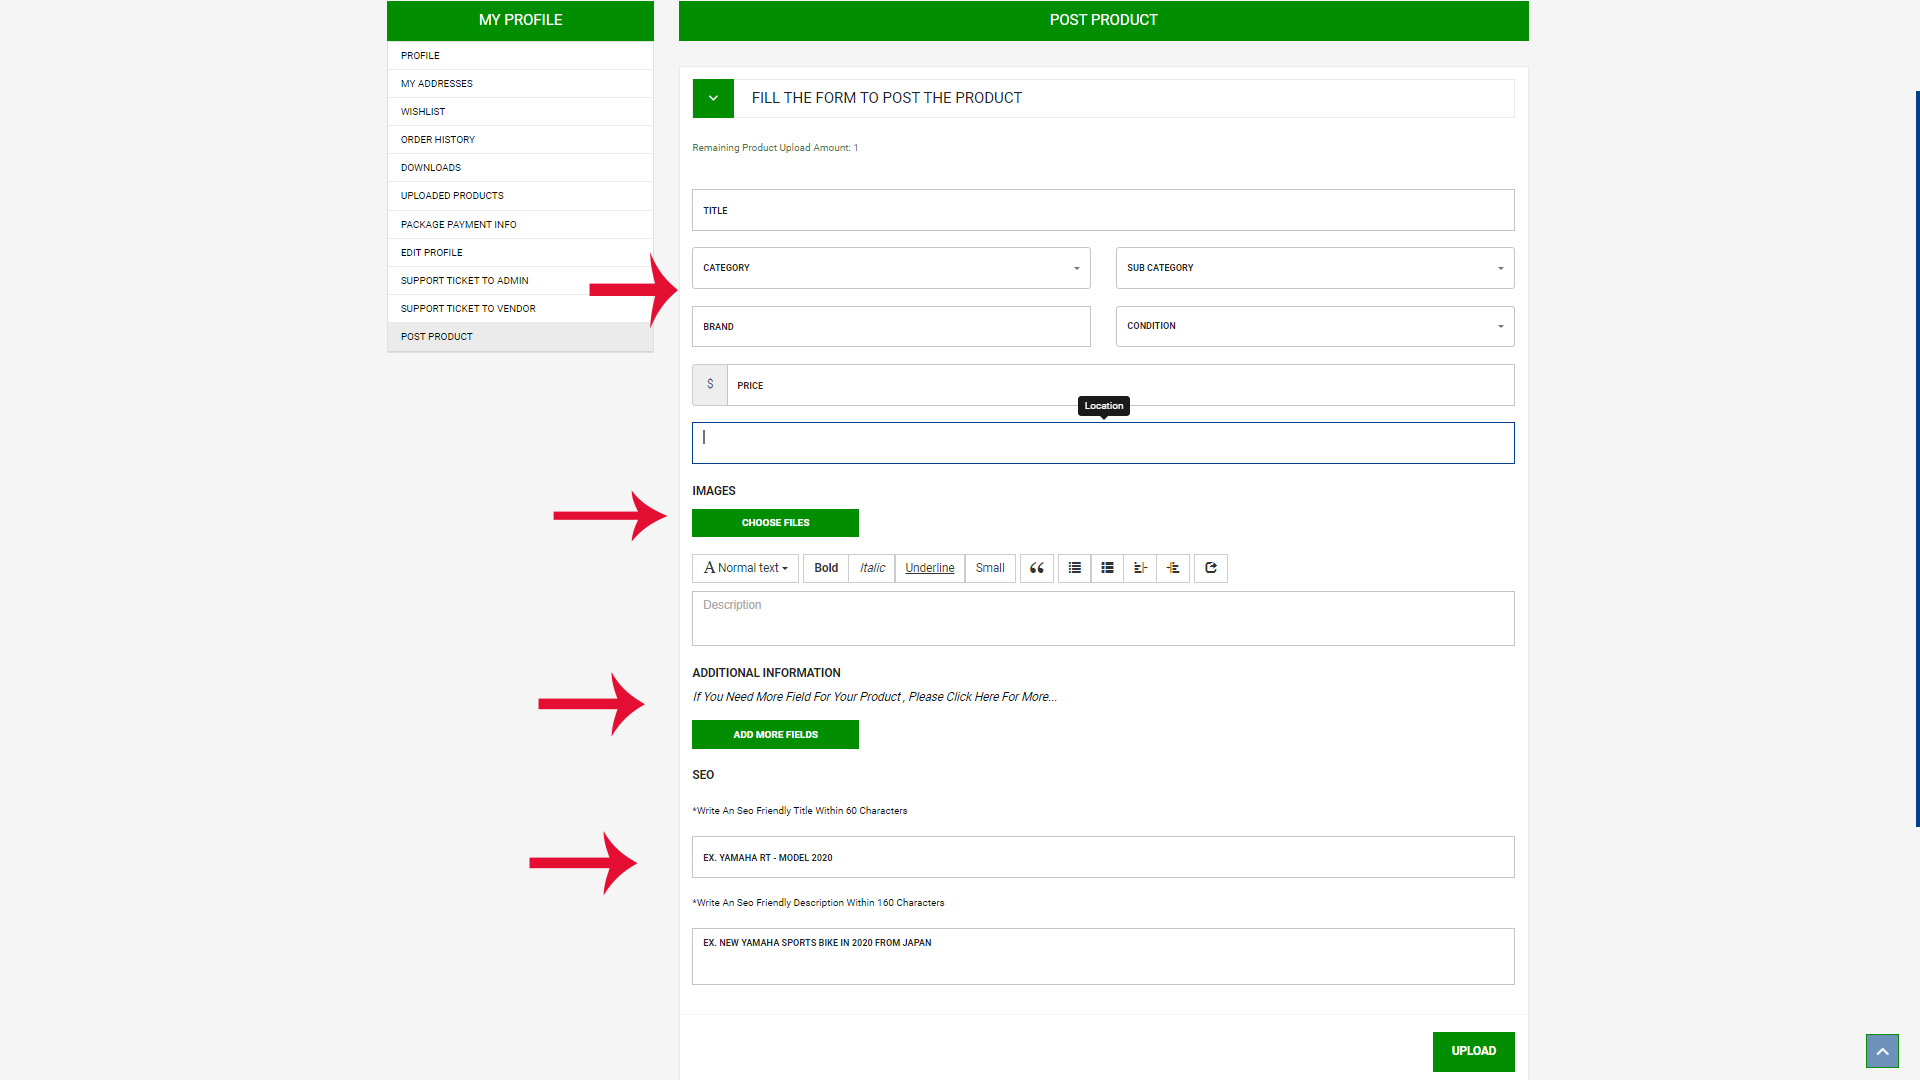
>> After login go to profile page. And click “Post Product” option from left section.

>> Here you can fill all the information about product/Ad name, category, Sub category, price. You can add product images. Below that you can see SEO detail title & description. It will help to search a product on google. Means when a product on dadorg will display on google then this SEO title description will show on google search.